Raymii.org

אֶשָּׂא עֵינַי אֶל־הֶהָרִים מֵאַיִן יָבֹא עֶזְרִֽי׃Home | About | All pages | Cluster Status | RSS Feed
Fade in / fade out in Qt/QML
Published: 19-08-2022 21:30 | Author: Remy van Elst | Text only version of this article
❗ This post is over three years old. It may no longer be up to date. Opinions may have changed.
Table of Contents
This guide shows you how to add a fade in / fade out effect to a control in QML. There are a lot of built in animations in Qt/QML, but no fade in/fade out. Using a state machine and a SequentialAnimation, we can first animate the opacity, then set the visibility, achieving a fade in / fade out effect. Other ways like a PropertyAnimation are also available but are less expressive or configurable.
The visibility property of an item cannot be animated directly, since it's a
bool. We therefore have to animate the opacity property,
which is a number from 0.0 to 1.0. Using a NumberAnimation gives control
over the duration and putting those in a SequentialAnimation makes them
happen in order. Combining that with the built in state machine every QML
control has (to invert the order of the effects when hiding the item) we
achieve a nicely animated fade in / fade out, without resorting to writing
custom OpenGL code in C++ for our own QML control.
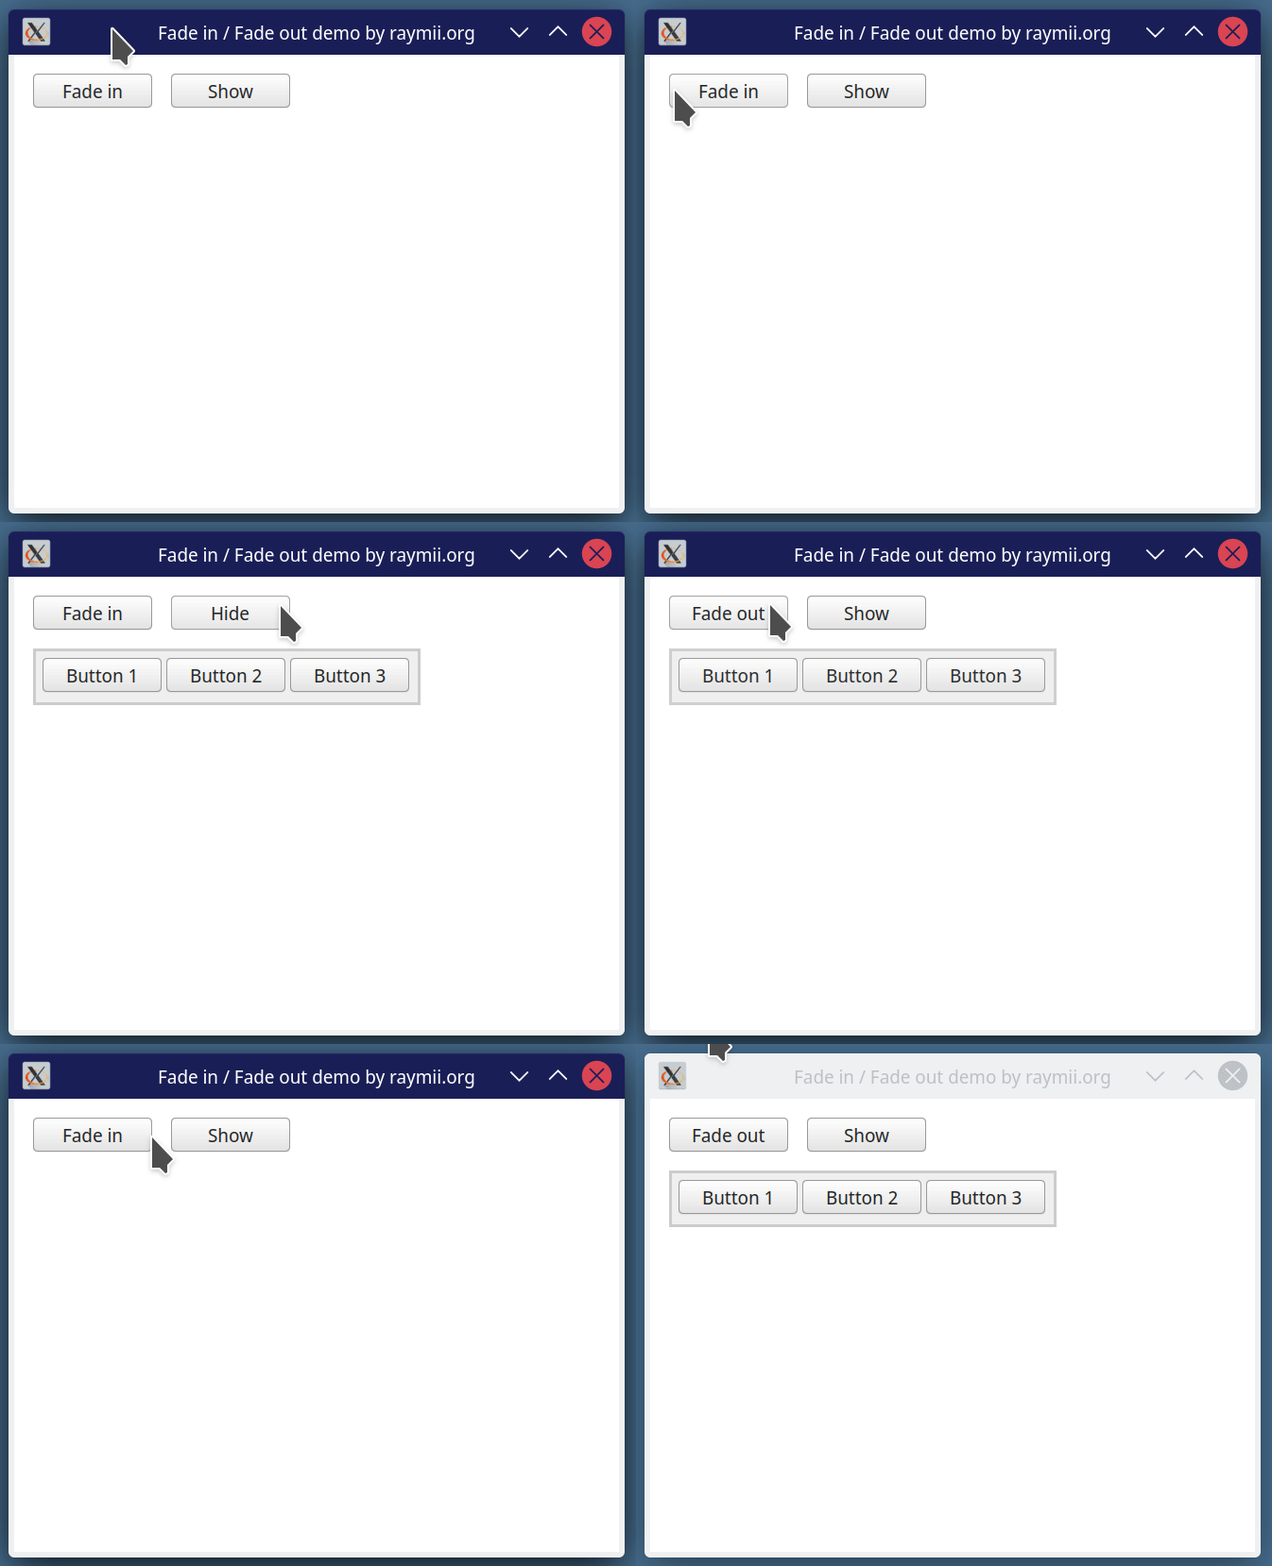
Here is a GIF showing the full effect and also how it looks when you're just toggling visibility:

Is this convoluted? Yes I think so, an entire state machine for just a fade in/fade out effect. Is it nice that Qt/QML allows you to hack this together using their builtin standard library? Yes, I do think so. Would I rather have an effect I can simply apply, much like, for example, one of the built in blur effects? Yes, that would be even better. Other animations and effects are easy to do, so why not add a built in for this effect?
QML Fade In / Fade Out
Add the following state machine and transitions to your QML control,
then bind the state to a property or trigger it directly. The id
of the control is exampleControl and the property that I use to
trigger the fade in / fade out animation is named folded.
id: exampleControl
property bool folded: false
state: !folded ? "Visible" : "Invisible"
states: [
    State{
        name: "Visible"
        PropertyChanges{target: exampleControl; opacity: 1.0}
        PropertyChanges{target: exampleControl; visible: true}
    },
    State{
        name:"Invisible"
        PropertyChanges{target: exampleControl; opacity: 0.0}
        PropertyChanges{target: exampleControl; visible: false}
    }
]

transitions: [
    Transition {
        from: "Visible"
        to: "Invisible"

        SequentialAnimation{
            NumberAnimation {
                target: exampleControl
                property: "opacity"
                duration: 500
                easing.type: Easing.InOutQuad
            }
            NumberAnimation {
                target: exampleControl
                property: "visible"
                duration: 0
            }
        }
    },

    Transition {
        from: "Invisible"
        to: "Visible"
        SequentialAnimation{
            NumberAnimation {
                target: exampleControl
                property: "visible"
                duration: 0
            }
            NumberAnimation {
                target: exampleControl
                property: "opacity"
                duration: 500
                easing.type: Easing.InOutQuad
            }
        }
    }
]
Full example source code
This is the code that creates the recorded GIF in the article. It shows the animation code and how to bind it to a property which can be triggered. I found the state machine example on stackoverflow, but I cannot find the specific topic in my browser history anymore, so I cannot link to the source example. If you do happen to know, please send me an email so I can update this article.
import QtQuick 2.15
import QtQuick.Controls 1.4
import QtQuick.Window 2.15

Window {
    width: 640
    height: 480
    visible: true
    title: qsTr("Fade in / Fade out demo by raymii.org")

    Column {
        anchors.fill: parent
        anchors.margins: 20
        spacing: 20

        Row {
            spacing: 20
            Button {
                text: fadeRect.folded ? "Fade in" : "Fade out"
                onClicked: fadeRect.folded = !fadeRect.folded
            }

            Button {
                text: toggleRect.visible ? "Hide" : "Show"
                onClicked: toggleRect.visible = !toggleRect.visible
            }

        }

        Rectangle {
            id: fadeRect
            width: 410
            height: 60
            border.width: 3
            property bool folded: true
            border.color: "#cccccc"
            color: "#efefef"

            Row {
                anchors.fill: parent
                anchors.margins: 10
                spacing: 5

                Button {
                    text: "Button 1"
                }
                Button {
                    text: "Button 2"
                }
                Button {
                    text: "Button 3"
                }
            }


            state: !folded ? "Visible" : "Invisible"
            states: [
                State{
                    name: "Visible"
                    PropertyChanges{target: fadeRect; opacity: 1.0}
                    PropertyChanges{target: fadeRect; visible: true}
                },
                State{
                    name:"Invisible"
                    PropertyChanges{target: fadeRect; opacity: 0.0}
                    PropertyChanges{target: fadeRect; visible: false}
                }
            ]

            transitions: [
                Transition {
                    from: "Visible"
                    to: "Invisible"

                    SequentialAnimation{
                        NumberAnimation {
                            target: fadeRect
                            property: "opacity"
                            duration: 500
                            easing.type: Easing.InOutQuad
                        }
                        NumberAnimation {
                            target: fadeRect
                            property: "visible"
                            duration: 0
                        }
                    }
                },

                Transition {
                    from: "Invisible"
                    to: "Visible"
                    SequentialAnimation{
                        NumberAnimation {
                            target: fadeRect
                            property: "visible"
                            duration: 0
                        }
                        NumberAnimation {
                            target: fadeRect
                            property: "opacity"
                            duration: 500
                            easing.type: Easing.InOutQuad
                        }
                    }
                }
            ]

        }


        Rectangle {
            id: toggleRect
            width: 410
            height: 60
            border.color: "#cccccc"
            color: "#efefef"
            border.width: 3
            visible: false

            Row {
                anchors.fill: parent
                anchors.margins: 10
                spacing: 5

                Button {
                    text: "Button 1"
                }
                Button {
                    text: "Button 2"
                }
                Button {
                    text: "Button 3"
                }
            }
        }
    }
}