Raymii.org

אֶשָּׂא עֵינַי אֶל־הֶהָרִים מֵאַיִן יָבֹא עֶזְרִֽי׃Home | About | All pages | Cluster Status | RSS Feed
Install NetBSD 9.2 on a DEC Alpha CPU in QEMU with X11
Published: 18-08-2021 | Last update: 27-08-2021 | Author: Remy van Elst | Text only version of this article
❗ This post is over four years old. It may no longer be up to date. Opinions may have changed.
Table of Contents
This is a guide on installing and running NetBSD for the Alpha CPU architecture on QEMU, including a GUI (X11 via VNC). It requires you to patch and compile QEMU yourself. It was never possible, until now, to run an actual operating system easily with QEMU Alpha, so this is amazing! It is very cool that Jason Thorpe is putting in so much effort on the QEMU side, as all but one patch is upstream already. Alpha emulation has always been a niche of a niche, so seeing this improve in QEMU is wonderful. OpenVMS does not boot yet since many more things are missing on the QEMU side, but who knows what the future might bring? Maybe even Windows NT for Alpha will boot on QEMU one day?
This article is based on work by astr0baby/DoktorCranium and his twitter screenshots. His guide is quite sparse, which I try to improve with this one. astr0baby does a lot of cool emulation stuff, his twitter is full of screenshots of his M1 Macbook running all kinds of legacy operating systems, from AIX to OpenVMS to MorphOS on whatever old CPU you can think of.
Here is how the end result of this guide looks:
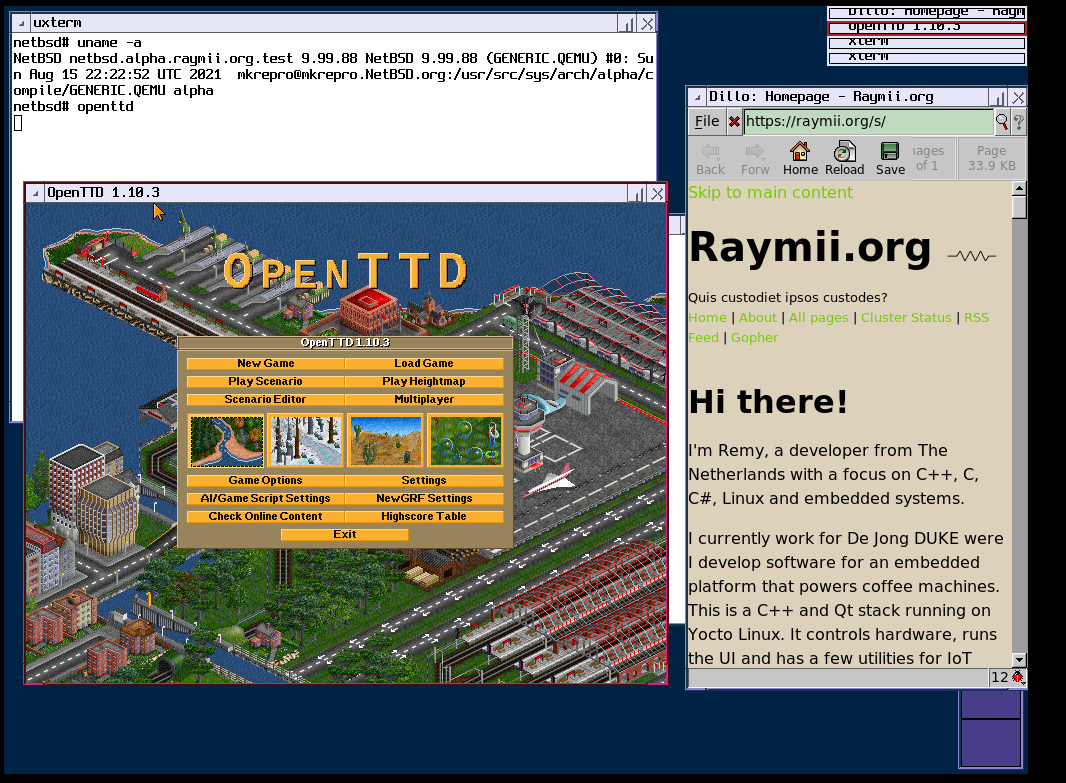
Modern OpenTTD and browsing on NetBSD on Alpha!
If you're interested in Alpha emulation or running OpenVMS, check out AXPbox or read this page for more information on available emulators. AXPbox can boot the NetBSD 9.1 installer, but it doesn't install yet, due to disk emulation issues. If you get it working with 9.2 or the current NetBSD development release, please let me know!
There were earlier attempts to use QEMU Alpha emulation, here is a guide from 2014 on running Debian. However, Debian dropped the Alpha architecture after version 5.0 (lenny), so NetBSD is our only modern option. And maybe Gentoo, but I'm unsure of that. Tru64 will not run on QEMU currently.
The Alpha machine QEMU emulates is based on the Alpha DP264 platform, this is probably best known as the basis of the Compaq AlphaServer ES40 and Compaq AlphaStation ES40 systems, although a number of other AlphaStations (e.g. XP900 and XP1000), AlphaServers (e.g. DS10 and DS20) and OEM boards (e.g. AlphaPC 264DP and API UP2000) were also based on it. (via)
I can't even do a cat /proc/cpuinfo. The NetBSD specific
cpuctl identify 0 command reports CPU identification not implemented for
this architecture. With dmesg you get some info, but not much:
dmesg | grep MHz
[     1.000000] 6600 family, unknown model variation 0x1400, 250MHz, s/n QEMU
Here's a screenshot of NeoFetch in the QEMU console:
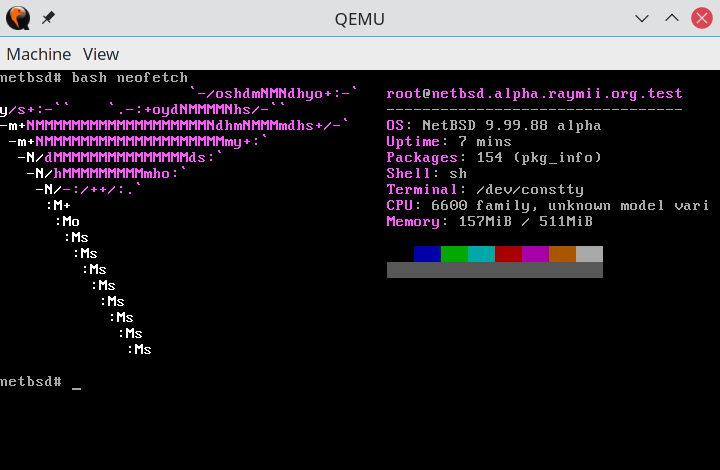
This guide is also available for AXPbox, the other open source DEC Alpha emulator.
Article changelog
- 2021-08-27: Added
openssl speedandsysbenchbenchmarks - 2021-08-20:
pkginworks again, repo issue fixed. Updated section in article accordingly. - 2021-08-19: Added a few responses from Jason's mailing list answer regarding kernel / emulation.
Patching and building QEMU
Due to not all patches being upstream you must build QEMU yourself. This process
is rather simple, as you would expect it is nothing more than getting the source code,
applying the patch and the regular ./configure followed by make. To install all
required build dependencies on Ubuntu, use the following command:
apt-get build-dep qemu
The patch file is rather small, which is why I can share it here. Place the below
contents in a file named alpha-mmclock-qemu.patch:
--- qemu/hw/rtc/mc146818rtc.c.orig  2020-10-01 00:56:55.574093880 +0000
+++ qemu/hw/rtc/mc146818rtc.c   2020-10-01 00:58:40.326479896 +0000
@@ -155,9 +155,15 @@ static uint32_t rtc_periodic_clock_ticks
 {
     int period_code;

+#if 0
+    /*
+     * Real hardware sets the PF bit rergardless if it actually
+     * raises an interrupt.
+     */
     if (!(s->cmos_data[RTC_REG_B] & REG_B_PIE)) {
         return 0;
      }
+#endif

     period_code = s->cmos_data[RTC_REG_A] & 0x0f;

@@ -944,6 +950,7 @@ static void rtc_realizefn(DeviceState *d
     }

     s->periodic_timer = timer_new_ns(rtc_clock, rtc_periodic_timer, s);
+    periodic_timer_update(s, qemu_clock_get_ns(rtc_clock), 0, true);
     s->update_timer = timer_new_ns(rtc_clock, rtc_update_timer, s);
     check_update_timer(s);
The manual process to build and install QEMU from the latest release is on
the official site. You can keep an eye on the source file mx146818rtc.c
git log to see if the patch process is still required. As of writing this
article, it is, the latest commit there is 2021-05-13 Philippe Mathieu...
hw/rtc/mc146818rtc: Convert to 3-phase reset (Resettabl...)
(fae5a0420754453beca3407250899254fb6745a1). I'm building git commit hash
bd44d64a3879bb6b0ca19bff3be16e0093502fac, but if you notice that the git
log of the above file is different, skip the patch/checkout step and let me
know if I need to update this article.
Clone the QEMU source repository:
git clone https://gitlab.com/qemu-project/qemu.git
Navigate into the source folder:
cd qemu
Checkout the specific commit I used when writing this article:
git checkout bd44d64a3879bb6b0ca19bff3be16e0093502fac
Apply the patch:
patch -p1 < alpha-mmclock-qemu.patch
Output should look like:
patching file hw/rtc/mc146818rtc.c
Hunk #2 succeeded at 934 (offset -16 lines).
Initialize all git submodules:
git submodule init
git submodule update --recursive
Start the actual build process, first the configure step, for speed of compilation specifically for the Alpha architecture only:
./configure --target-list=alpha-softmmu
Followed by make to start compilation. Replace -j8 with your amount of CPU cores:
make -j8
No make install, since I suspect you already have qemu installed and just
want to test out stuff. This build, due to being configured with a
specific target, will only work with that, not "regular" QEMU as
provided by your distro.
Make will take some time, when it is finished compiling, you should
have a binary named qemu-system-alpha inside the build folder:
file build/qemu-system-alpha
Output:
build/qemu-system-alpha: ELF 64-bit LSB pie executable, x86-64, version 1
(SYSV), dynamically linked, interpreter /lib64/ld-linux-x86-64.so.2,
BuildID[sha1]=bc41c3dfc1d574362343dbe4f8d06ad1f72806a6, for GNU/Linux
4.4.0, with debug_info, not stripped
If you run the binary, you should see a black window with a green text
greeting you (Hello):
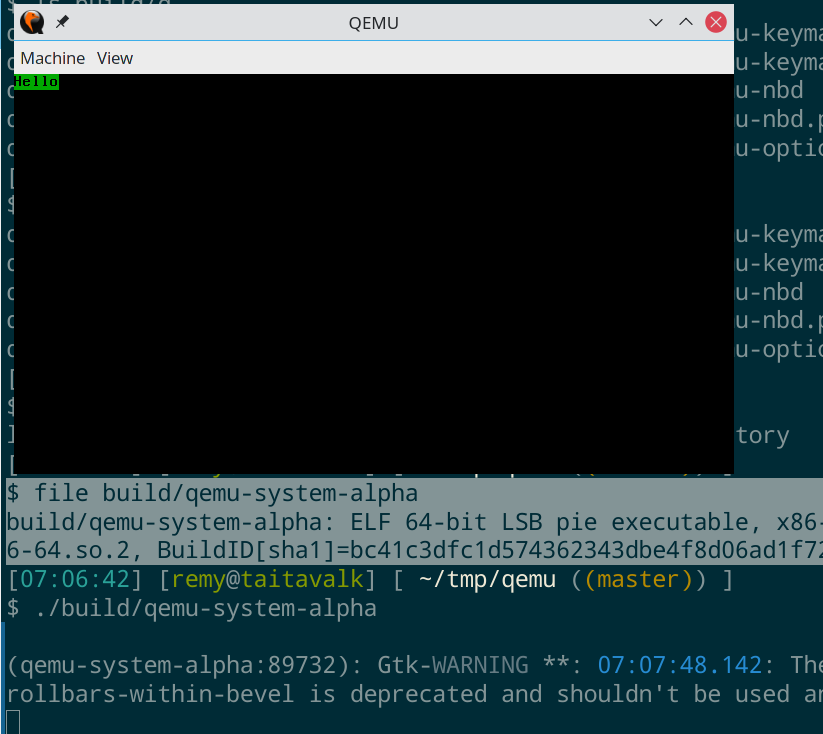
I had some configure errors (for example ERROR:
Program 'keycodemapdb/tools/keymap-gen' not found) that were the result of
the git submodule update command failing. I had to reset all submodules and
try again with the following commands:
git clean -xfd
git submodule foreach --recursive git clean -xfd
git reset --hard
git submodule foreach --recursive git reset --hard
git submodule update --init --recursive
Installing NetBSD
The installation process runs as usual once it's booted up. You use an interactive installer to install NetBSD, but to boot, we must provide the kernel to QEMU manually. The kernel file for installation is different from the one for "regular" use.
Downloading the ISO and kernels
Check the following directory for the current version of the latest
current ISO, in my case NetBSD-9.99.88-alpha.iso. Download the ISO:
wget https://nycdn.netbsd.org/pub/NetBSD-daily/HEAD/latest/images/NetBSD-9.99.88-alpha.iso
Note: If the version number changed, the above command will return a 404 error and you must specify the new URL yourself.
More information on how the current (development/daily) builds work can be
found here on the NetBSD site.
I asked on the mailing list why the kernels should be provided to QEMU outside of the installed disk, this is what Jason had to say:
The Qemu "bios" (palcode-clipper) for its Alpha emulation does not contain any of the I/O callbacks implemented by real DEC SRM firmware. Nor does it contain any of the CLI implemented by real DEC SRM firmware. As such, there is no way to use a boot loader program to load the kernel from the file system in the emulated machines disks.
Download the two kernel files, start with the one for installation:
wget http://nycdn.netbsd.org/pub/NetBSD-daily/HEAD/latest/alpha/installation/instkernel/netbsd.gz
Uncompress it and rename so we know which one is which:
gunzip netbsd.gz
mv netbsd inst-netbsd
My file is for 9.99.88, yours may differ:
file inst-netbsd
Output:
inst-netbsd: ELF 64-bit LSB executable, Alpha (unofficial), version 1
(SYSV), statically linked, for NetBSD 9.99.88, stripped
Same for the one for regular use:
wget http://nycdn.netbsd.org/pub/NetBSD-daily/HEAD/latest/alpha/binary/kernel/netbsd-GENERIC.QEMU.gz
Extract it:
gunzip netbsd-GENERIC.QEMU.gz
File information:
netbsd-GENERIC.QEMU: ELF 64-bit LSB executable, Alpha(unofficial), version
1 (SYSV), statically linked, for NetBSD 9.99.88, not stripped
I asked what the difference is between the installation kernel and the regular QEMU kernel file on the mailing list:
GENERIC.QEMU is exactly the same as GENERIC except that it has the kernel symbol table injected into it for use by the in-kernel debugger (and, eventually, the in-kernel linker for modules, once I finish implementing all of the necessary relocations for Alpha).
NetBSD Installation
Create a disk file which the installation will use:
qemu-img create -f qcow2 disk.img 20G
Start QEMU with the following command to start the installation:
./build/qemu-system-alpha \
-m 1024 \
-kernel inst-netbsd \
-drive file=disk.img,media=disk,format=qcow2,index=0 \
-drive file=NetBSD-9.99.88-alpha.iso,media=cdrom,format=raw,index=1 \
-net nic \
-net user,hostfwd=tcp::2222-:22
Change the ISO filename if the version number has changed upstream
(NetBSD-9.99.88-alpha.iso).
If you haven't applied the patch, the install will boot but hang with an error regarding the clock:
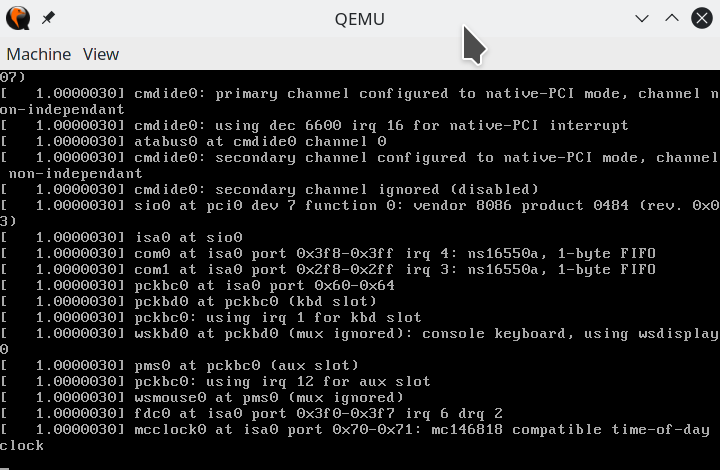
Otherwise, you will be asked what type of terminal you're using and the installation will start as you're used to:
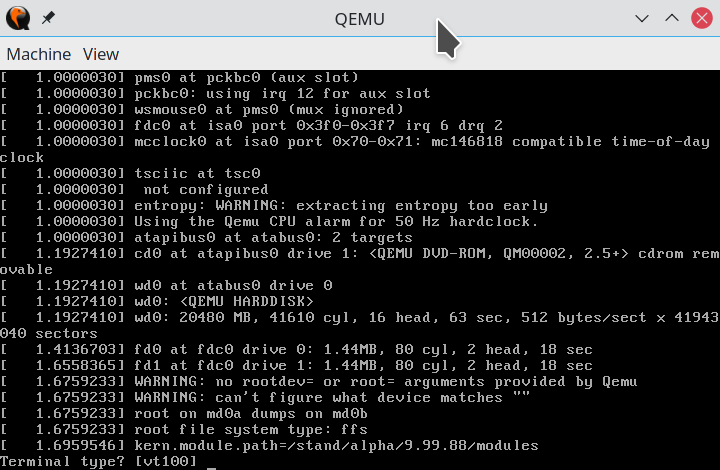
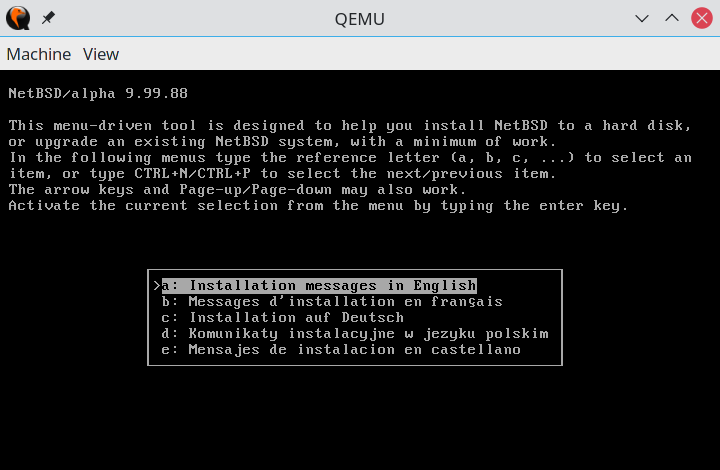
Continue on with the interactive installer. I'm not covering the entire installation process since there are no special things you need to do (like the qemu patch above).
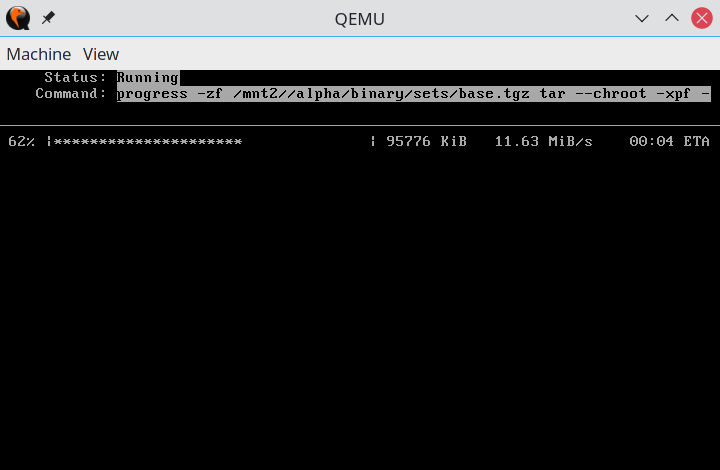
I choose a full installation (not minimal or without X11), installed to disk wd0
using the CDROM as source:
I also setup networking during the installation, as well as enable SSH and mdns:
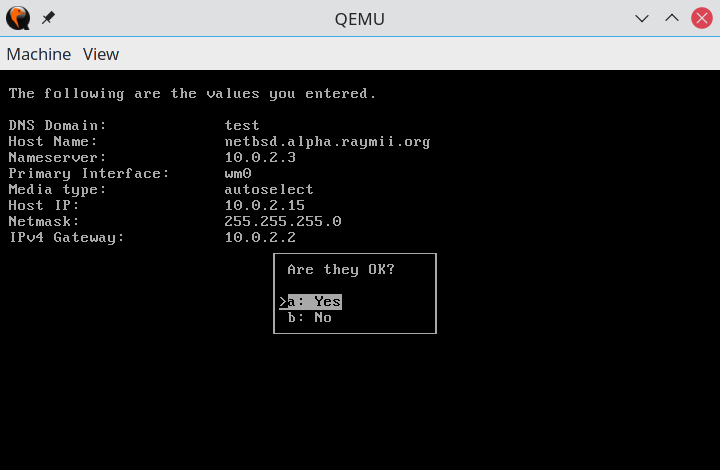
Here's the summary:
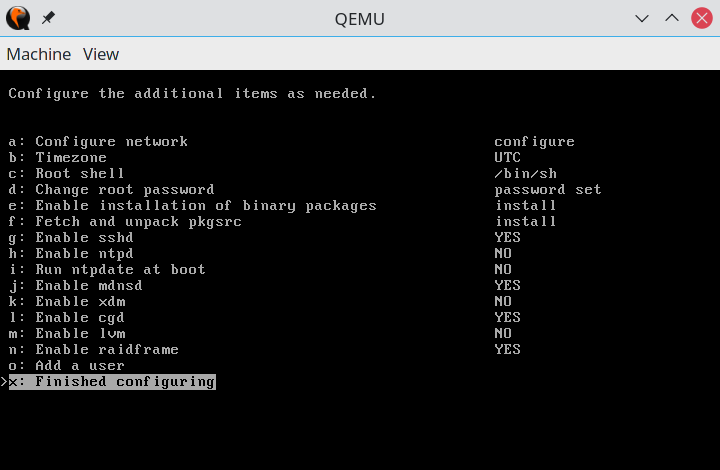
Once you're done installing, shut down the VM with the following command:
shutdown -p now
Running NetBSD
Once NetBSD is installed, the command to start qemu is different, since we're using a
different kernel file and we're telling NetBSD which drive to boot from (wd0).
This is the new command:
./build/qemu-system-alpha \
-m 1024 \
-kernel netbsd-GENERIC.QEMU \
-drive file=disk.img,media=disk,format=qcow2,index=0 \
-drive file=NetBSD-9.99.88-alpha.iso,media=cdrom,format=raw,index=1 \
-append "rootdev=/dev/wd0" \
-net nic \
-net user,hostfwd=tcp::2222-:22
If you do get questions asked during boot, just press ENTER to accept the defaults.
If all went well, you should be able to login to your fresh new shiny Alpha NetBSD:
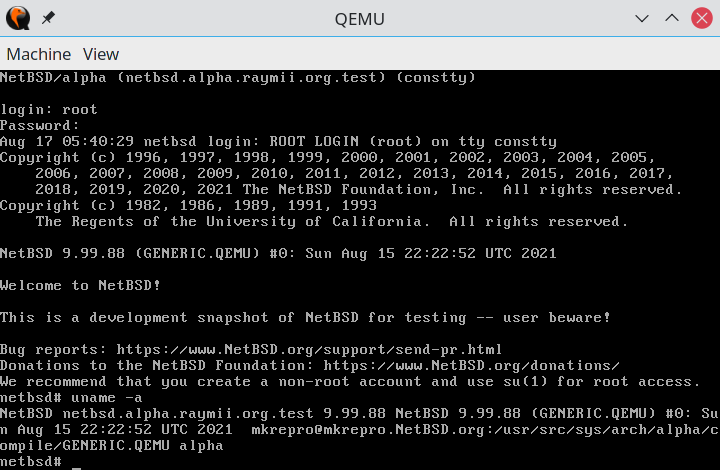
Networking works out of the box as well:
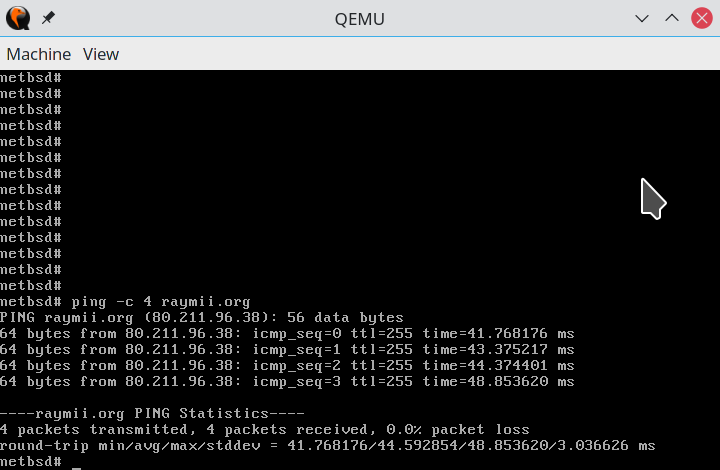
Awesome, well done. For the final part, we're going to install and setup TigerVNC so we can play around with a GUI.
Connecting via SSH to NetBSD
The QEMU VM is started with the option -net user,hostfwd=tcp::2222-:22. This
means that on you local machine, port 2222 is forwarded to port 22 on the
VM. To SSH into the NetBSD machine (assuming networking is setup and
working), you can connect to that port on localhost:
ssh root@127.0.0.1 -p 2222
I had to allow root login (vi /etc/ssh/sshd_config, PermitRootLogin yes,
service sshd restart), which in this case, for this local test machine not
directly exposed to the internet, is not a security risk.
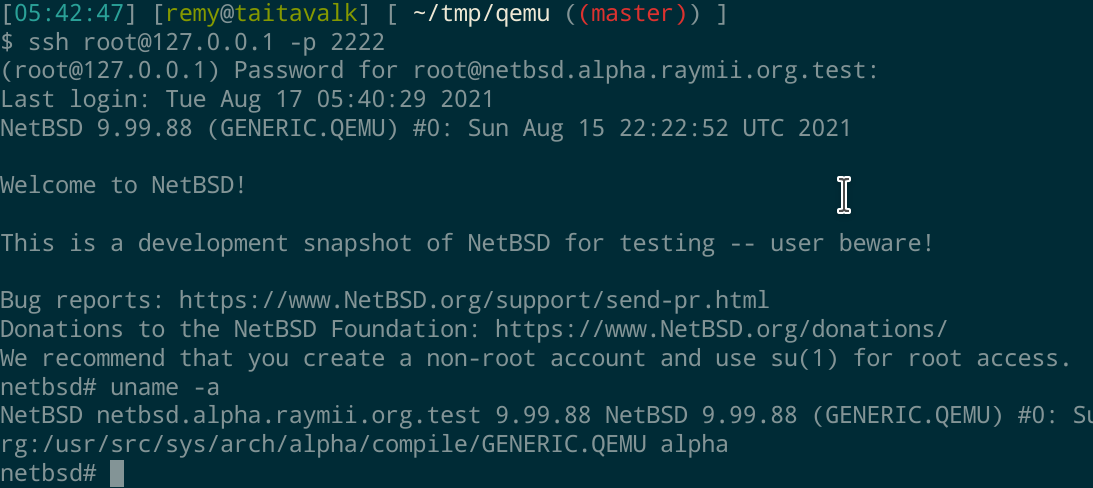
If you're unable to install packages (for whatever reason), you can use the built-in features to have a GUI via SSH and Xnest. See my other article how to do that.
Setup X11 and VNC (GUI)
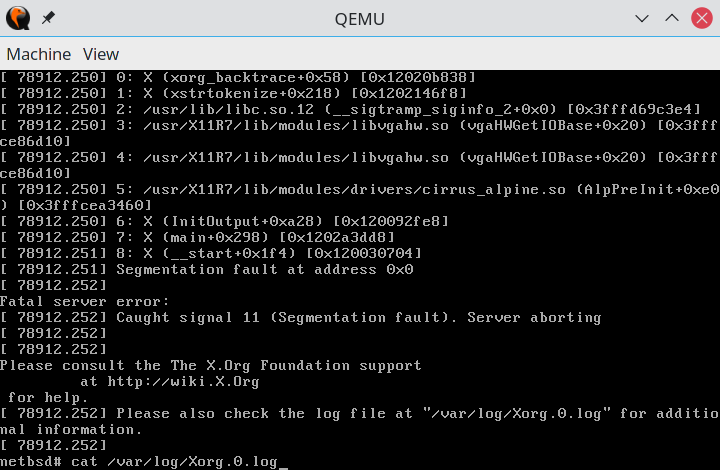
X is installed by default, but crashes with a segfault if you run it on
the QEMU VGA console (X -configure, then X -config /root/xorg.conf.new).
Therefore, we're going to use VNC, which does run and is quite fast and
usable. The tigervnc server is not included in the installation, which is
why we start with setting up the package manager and installing a few
packages.
A screenshot of the segfault:
Installing binary packages (pkgsrc)
Assuming networking works, we can use the usual way to install binary packages. How amazing it is that NetBSD provides binary packages for Alpha, compiling them would otherwise take very long.
Type the following commands in the shell to install the binary package manager:
PATH="/usr/pkg/sbin:/usr/pkg/bin:$PATH"
PKG_PATH="https://cdn.NetBSD.org/pub/pkgsrc/packages"
PKG_PATH="$PKG_PATH/NetBSD/alpha/9.2/All/"
export PATH PKG_PATH
pkg_add pkgin
Update the package sources:
pkgin update
After that, you can install tigervnc:
pkgin install tigervnc
When writing this article, there was an issue with the repository, the index
file was corrupt. The below section covers that, but you can probably skip
it if you're not interested in NetBSD's packaging system. You can continue
with the section TigerVNC Configuration. After sending a message on the
port-alpha mailing list, John fixed the repository.
In my case, pkgin update gave an error, pkgin: Short read of pkg_summary: truncated
bzip2 input. This seems to be a corrupt file, which I cannot fix from
here. I did however saw on the directory index, that there also was a gzipped
version (not bzip2), pkg_summary.gz, but I could not find a way to get
that file instead of the bzip2 file.
pkgin is a handy wrapper that mimicks apt/yum, but underneath it uses
pkg_*, as far as I know, which we can also do manually. The repository URL
is setup after we've exported the variables earlier, so you should be able to
just do:
pkg_add fetch
You can also specify the entire URL to a package:
pkg_add ftp://ftp.netbsd.org/pub/pkgsrc/packages/NetBSD/alpha/9.2/All/fetch-1.9nb1.tgz
For the exact filename you can browse the web index of Alpha packages.
You can also use ftp to download the package, then install it locally:
ftp -i ftp://ftp.netbsd.org/pub/pkgsrc/packages/NetBSD/alpha/9.2/All/fetch-1.9nb1.tgz
pkg_add ./fetch-1.9nb1.tgz
That will however still connect to the network to fetch dependencies, so if you're doing this offline (lets say via an NFS share), you might run into issues there.
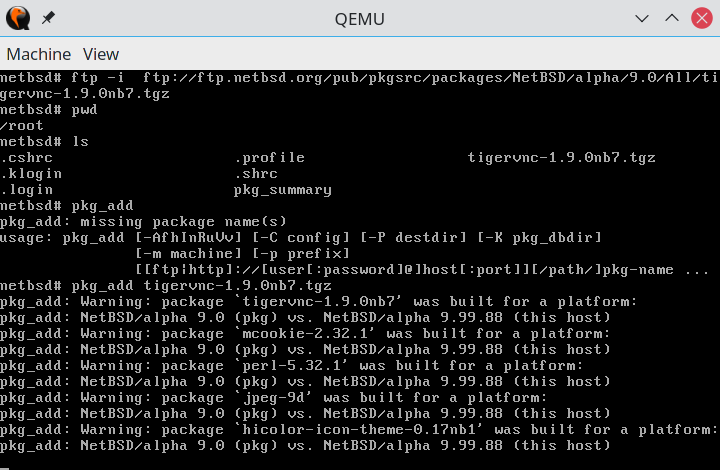
Install the tigervnc package:
pkg_add tigervnc
It will fetch some dependencies and should install correctly:
TigerVNC configuration
Configuring tigerVNC is simple since most configuration is already done via the package. Start by setting up a VNC password:
vncpasswd
Enter the password twice:
Password:
Verify:
Answer no to a view only password:
Would you like to enter a view-only password (y/n)? n
Start the VNC server:
vncserver
Output:
New 'netbsd.alpha.raymii.org:1 (root)' desktop is netbsd.alpha.raymii.org:1

Creating default startup script /root/.vnc/xstartup
Creating default config /root/.vnc/config
Starting applications specified in /root/.vnc/xstartup
Log file is /root/.vnc/netbsd.alpha.raymii.org:1.log
To connect to your shiny new awesome desktop, you must use SSH to forward a port. Disconnect your SSH session and reconnect with a new flag for a local port forward:
ssh root@127.0.0.1 -p 2222 -L 5901:127.0.0.1:5901
This forwards port 5901 (VNC port for display :1) on your local machine to
port 5901 on the virtual machine. After logging in, you should be able to
use any VNC client to connect right away:
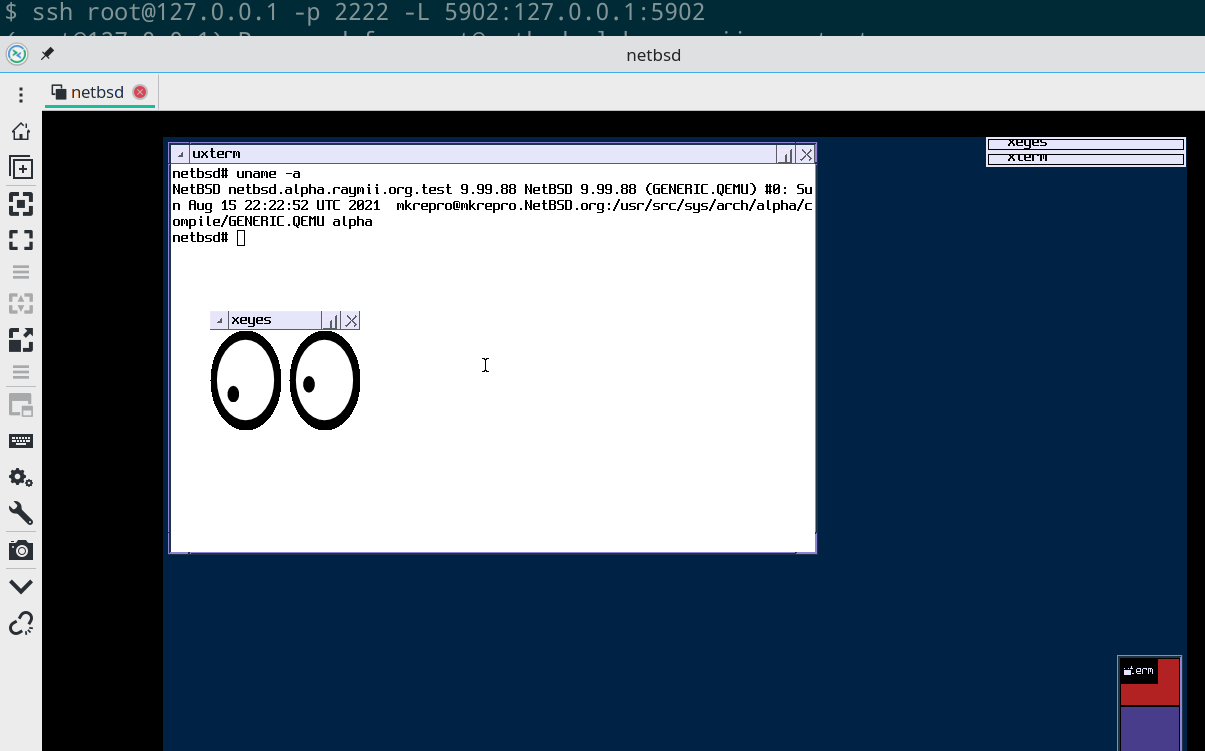
How cool is that? A modern NetBSD with a graphical desktop on a CPU architecture (Alpha) running in QEMU, with networking.
After rebooting, you need to enter the vncserver command again to start
VNC. You can also setup a service to autostart at boot, but I'm not going
to cover how to do that in this guide. You've gotten this far on a weird
CPU emulation article, I bet you that you're very capable of figuring
autostarting VNC out yourself.
For some more fun, you can install a browser (netsurf or dillo, firefox or
chrome are not available as packages) or a game (my favorite, openttd is
available as a package including the free graphics openttd-data). OpenTTD
is quite playable. Not very fast, but a small map seems to run okay.
It even seems xfce4 packages are available in the repository, so you could deck out
a full featured desktop. I've tried installing it, but after 18 hours or so, it's
still running. Netsurf took just as long, and it seems to be the installation
of GTK that takes so much time. As Jason says on the mailing list, it might be
related to disk IO:
Yikes. I'll need pkg install experts to weigh in on this. It's entirely possible that it's bottlenecked on the disk emulation. I'm working on getting VirtIO to work on alpha so hopefully we can speed disk and network access up a little.
If there is any software you do want to run but not available as a binary
package, compiling it yourself (or letting pkgsrc do it for you) is always
an option.

I managed to compile python2 via pkgsrc, the cvs checkout of pkgsrc
took a day or so to complete:

The setup of pkgsrc for source compilation is documented on the NetBSD website
but this is the process I used, if you want to try it out:
cd /usr && cvs -q -z2 -d anoncvs@anoncvs.NetBSD.org:/cvsroot checkout -r pkgsrc-2021Q1 -P pkgsrc
cd /usr/pkgsrc/lang/python27
make fetch-list | sh; # fetch dependencies
make NO_CHECKSUM=yes
make install
If you get any segfaults or internal compiler errors during building, my
experience is that those go away if you retry the build. (Do a make clean first).
Below is an example error message, which did not occur when I retried the compilation:
mv -f .deps/loadapi.Tpo .deps/loadapi.Po
gcc -DLOCALEDIR=\"/usr/pkg/share/locale\" -DLIBDIR=\"/usr/pkg/lib\" -DINCLUDEDIR=\"/usr/pkg/include\" -DHAVE_CONFIG_H -I.  -I./glob   -I/usr/include -I/usr/pkg/include  -O2 -mieee -D_FORTIFY_SOURCE=2 -I/usr/include -MT main.o -MD -MP -MF .deps/main.Tpo -c -o main.o main.c
during GIMPLE pass: cddce
main.c: In function 'main':
main.c:1066:1: internal compiler error: Segmentation fault
 1066 | main (int argc, char **argv, char **envp)
      | ^~~~
no stack trace because unwind library not available
Please submit a full bug report,
with preprocessed source if appropriate.
See <http://www.NetBSD.org/support/send-pr.html> for instructions.
*** Error code 1

Stop.
make[2]: stopped in /usr/pkgsrc/devel/gmake/work/make-4.2.1
*** Error code 1
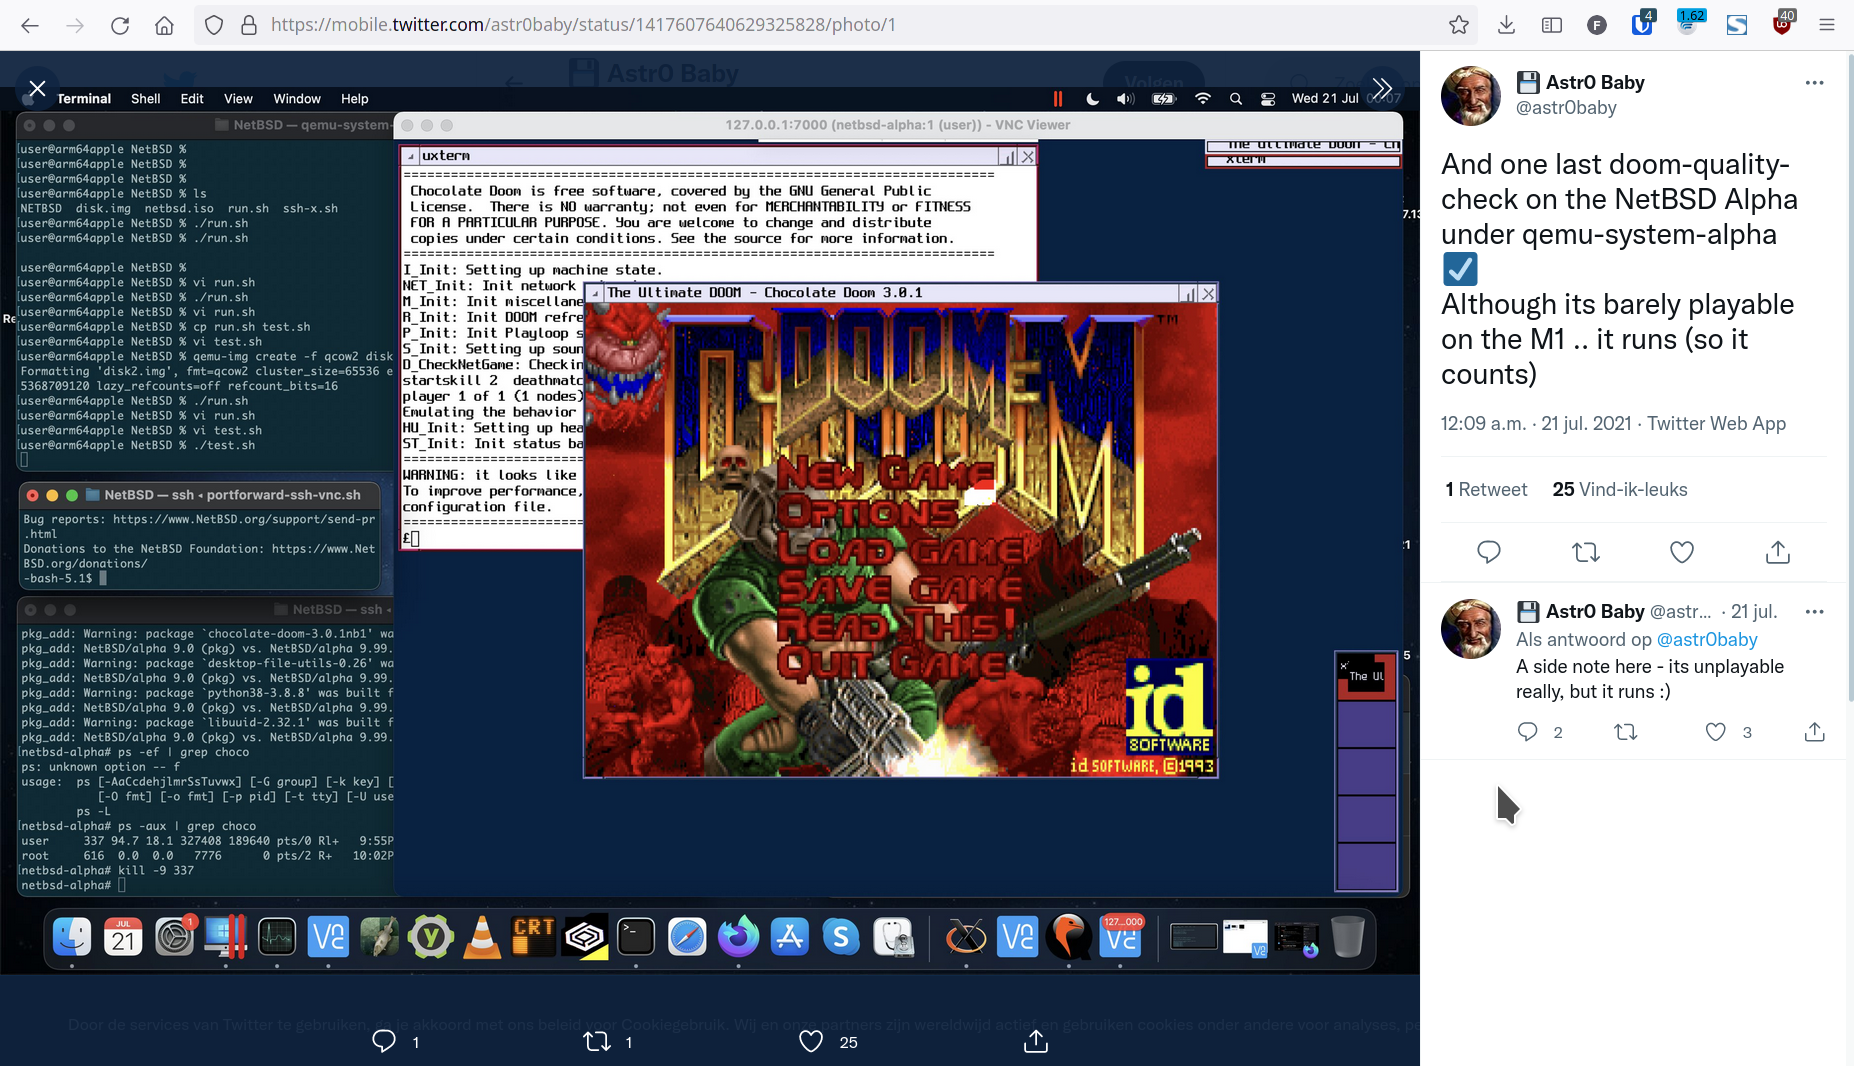
Astrobaby even got DOOM running:
OpenSSL Speed Benchmark
This article has some benchmarks on Debian 5.0 on QEMU Alpha, including
OpenSSL speed. EmuVM has a few benchmarks as well, both real Alpha
machines as their commercial emulator. Most of the other benchmarks do not
run on NetBSD (Only OpenVMS or Tru64), so reproducing that is hard. OpenSSL
however, is included on NetBSD by default. Newer version, but hopefully
comparable results.
OpenSSL speed is a performance benchmark for each of the available
algorithms. Because this is an old CPU architecture, and because the other
article does so (as well as EmuVM), I'm trying just the md5 and
rsa benchmarks.
The OpenSSL benchmark fails. Results overflow on the RSA side and MD5 doesn't give any numbers. Not sure if this is an emulation issue, or a NetBSD issue. Might also be in OpenSSL, it's quite a new version(1.1.1) and I'm not sure if the OpenSSL project still tests on Alpha machines. I'm including the results, for future reference it might be interesting. For comparison however, they are useless.
Results of rsa calculations:
netbsd# openssl speed rsa
Doing 512 bits private rsa's for 10s:
Doing 512 bits public rsa's for 10s: 100761 512 bits public RSA's in 0.00s
Doing 1024 bits private rsa's for 10s: 2142 1024 bits private RSA's in 0.00s
Doing 1024 bits public rsa's for 10s: 113632 1024 bits public RSA's in 0.00s
Doing 2048 bits private rsa's for 10s: 1138 2048 bits private RSA's in 0.00s
Doing 2048 bits public rsa's for 10s: 40512 2048 bits public RSA's in 0.00s
Doing 3072 bits private rsa's for 10s: 385 3072 bits private RSA's in 0.00s
Doing 3072 bits public rsa's for 10s: 20155 3072 bits public RSA's in 0.00s
Doing 4096 bits private rsa's for 10s: 174 4096 bits private RSA's in 0.00s
Doing 4096 bits public rsa's for 10s: 11464 4096 bits public RSA's in 0.00s
Doing 7680 bits private rsa's for 10s: 29 7680 bits private RSA's in 0.00s
Doing 7680 bits public rsa's for 10s: 3540 7680 bits public RSA's in 0.00s
Doing 15360 bits private rsa's for 10s: 4 15360 bits private RSA's in 0.00s
Doing 15360 bits public rsa's for 10s: 913 15360 bits public RSA's in 0.00s
OpenSSL 1.1.1k  25 Mar 2021
NetBSD 9.99.88
options:bn(64,64) rc4(int) des(int) aes(partial) idea(int) blowfish(ptr)
gcc version 10.3.0 (NetBSD nb1 20210411)
                  sign    verify    sign/s verify/s
rsa  512 bits      infs 0.000000s      0.0 923036700778489577472.0
rsa 1024 bits 0.000000s 0.000000s 20953569512310820864.0 1054135706452407615488.0
rsa 2048 bits 0.000000s 0.000000s 11156638280728354816.0 374733567055141208064.0
rsa 3072 bits 0.000000s 0.000000s 3761703789465102336.0 186142468490230857728.0
rsa 4096 bits 0.000000s 0.000000s 1695153782552369408.0 105969518684333555712.0
rsa 7680 bits 0.000000s 0.000000s 278990477569769280.0 32383696070560972800.0
rsa 15360 bits 0.000000s 0.000000s 37610866572920040.0 8378888909113309184.0
Results of md5 calculations:
netbsd# openssl speed md5
Doing md5 for 3s on 16 size blocks:
Doing md5 for 3s on 64 size blocks:
Doing md5 for 3s on 256 size blocks:
Doing md5 for 3s on 1024 size blocks:
Doing md5 for 3s on 8192 size blocks:
Doing md5 for 3s on 16384 size blocks:
OpenSSL 1.1.1k  25 Mar 2021   NetBSD 9.99.88
options:bn(64,64) rc4(int) des(int) aes(partial) idea(int) blowfish(ptr)
gcc version 10.3.0 (NetBSD nb1 20210411)
The 'numbers' are in 1000s of bytes per second processed.
type             16 bytes     64 bytes    256 bytes   1024 bytes   8192 bytes  16384 bytes
md5                  0.00         0.00         0.00         0.00         0.00         0.00
I did try to play with some options (longer runtime, -elapsed flag
(Use wall-clock time instead of CPU user time as divisor) but none
helped. The weird thing is that these two commands work fine on AXPbox with NetBSD,
which makes me suspect that there is an issue with QEMU emulation as opposed to
an issue in OpenSSL. The other article has OpenSSL results from Debian 5.0,
so it might be a combination of this OpenSSL version with QEMU, but I'm not sure.
SysBench benchmark
The NetBSD Alpha package repository does have a sysbench package.
Sysbench is quite a populair cross platform benchmarking tool and it even
gave reasonable results, as opposed to OpenSSL. It's an older version,
currently we're at sysbench 1.0.20 and NetBSD has 0.4.12.
CPU:
sysbench --test=cpu run --max-time=30
sysbench 0.4.12:  multi-threaded system evaluation benchmark

Running the test with following options:
Number of threads: 1

Doing CPU performance benchmark

Threads started!
Time limit exceeded, exiting...
Done.

Maximum prime number checked in CPU test: 10000


Test execution summary:
    total time:                          30.0547s
    total number of events:              532
    total time taken by event execution: 30.0458
    per-request statistics:
         min:                                 53.15ms
         avg:                                 56.48ms
         max:                                132.93ms
         approx.  95 percentile:                infms

Threads fairness:
    events (avg/stddev):           532.0000/0.00
    execution time (avg/stddev):   30.0458/0.00
Memory:
netbsd# sysbench --test=memory run --max-time=60
sysbench 0.4.12:  multi-threaded system evaluation benchmark

Running the test with following options:
Number of threads: 1

Doing memory operations speed test
Memory block size: 1K

Memory transfer size: 102400M

Memory operations type: write
Memory scope type: global
Threads started!
Time limit exceeded, exiting...
Done.

Operations performed: 1257653 (20960.15 ops/sec)

1228.18 MB transferred (20.47 MB/sec)


Test execution summary:
    total time:                          60.0021s
    total number of events:              1257653
    total time taken by event execution: 56.4853
    per-request statistics:
         min:                                  0.02ms
         avg:                                  0.04ms
         max:                                202.10ms
         approx.  95 percentile:                infms

Threads fairness:
    events (avg/stddev):           1257653.0000/0.00
    execution time (avg/stddev):   56.4853/0.00
A 30 second timeout failed the test, which is why the max time for memory is 60.
File I/O:
netbsd# sysbench --test=fileio --file-test-mode=seqwr --file-num=8 run --max-time=60
sysbench 0.4.12:  multi-threaded system evaluation benchmark

Running the test with following options:
Number of threads: 1

Extra file open flags: 0
8 files, 256Mb each
2Gb total file size
Block size 16Kb
Periodic FSYNC enabled, calling fsync() each 100 requests.
Calling fsync() at the end of test, Enabled.
Using synchronous I/O mode
Doing sequential write (creation) test
Threads started!
Done.

Operations performed:  0 Read, 131072 Write, 8 Other = 131080 Total
Read 0b  Written 2Gb  Total transferred 2Gb  (34.332Mb/sec)
 2197.25 Requests/sec executed

Test execution summary:
    total time:                          59.6529s
    total number of events:              131072
    total time taken by event execution: 57.6667
    per-request statistics:
         min:                                  0.11ms
         avg:                                  0.44ms
         max:                              13918.59ms
         approx.  95 percentile:                infms

Threads fairness:
    events (avg/stddev):           131072.0000/0.00
    execution time (avg/stddev):   57.6667/0.00
The default number of files (128) failed with an error message, too many open files, which is why I tried with 8.
Comparing the results to AXPbox is interesting. Summarized below are the AXPbox results:
CPU: total number of events: 19
Memory: 447.07 MB transferred (7.45 MB/sec)
Disk: Operations performed:  0 Read, 37353 Write, 0 Other = 37353 Total
Read 0b  Written 583.64Mb  Total transferred 583.64Mb  (9.7263Mb/sec)
  622.48 Requests/sec executed
These are the QEMU results, running on the same host machine and the same NetBSD version:
CPU: total number of events: 532
Memory: 1228.18 MB transferred (20.47 MB/sec)
Disk: Operations performed:  0 Read, 131072 Write, 8 Other = 131080 Total
Read 0b  Written 2Gb  Total transferred 2Gb  (34.332Mb/sec)
 2197.25 Requests/sec executed
The emulation provided by QEMU seems to be faster by a large amount, on all three tests. This is a basic benchmark and we have to keep in mind that both emulators emulate different hardware and that the core code of AXPbox is over 10 years old.
A comparison with the machine that runs the QEMU VM (x86, Intel i7-8750H):
$ sysbench --test=cpu run --max-time=30
WARNING: the --test option is deprecated. You can pass a script name or path on the command line without any options.
WARNING: --max-time is deprecated, use --time instead
sysbench 1.0.20 (using system LuaJIT 2.0.5)

Running the test with following options:
Number of threads: 1
Initializing random number generator from current time

Prime numbers limit: 10000

Initializing worker threads...

Threads started!

CPU speed:
    events per second:  1369.69

General statistics:
    total time:                          30.0010s
    total number of events:              41094

Latency (ms):
         min:                                    0.71
         avg:                                    0.73
         max:                                    3.78
         95th percentile:                        0.75
         sum:                                29991.75

Threads fairness:
    events (avg/stddev):           41094.0000/0.00
    execution time (avg/stddev):   29.9918/0.00