Raymii.org

אֶשָּׂא עֵינַי אֶל־הֶהָרִים מֵאַיִן יָבֹא עֶזְרִֽי׃Home | About | All pages | Cluster Status | RSS Feed
Get started with the Nitrokey HSM or SmartCard-HSM
Published: 19-06-2016 | Last update: 20-06-2021 | Author: Remy van Elst | Text only version of this article
❗ This post is over four years old. It may no longer be up to date. Opinions may have changed.
Table of Contents
- Changelog
- What is an HSM (Hardware Security Module)
- Nitrokey and SmartCard HSM
- Software installation
- PKCS#11, #15 and OpenSC
- SO and User Pins
- Warnings
- HSM Backups with a DKEK
- Initialize the HSM
- Create a keypair
- Backing up and restoring the keys with a DKEK
- Using the keys
- SSH Keys with the HSM
- Using the HSM for Thunderbird with S/MIME
- Deleting objects from the HSM
- Apache with mod_nss
- Decrypting the private keys of the HSM
- Storing arbitraty data in Elementary Files (EF)
This is a guide to get started with the Nitrokey HSM (or SmartCard-HSM). It covers what a HSM is and what it can be used for. It also goes over software installation and initializing the device including backups of the device and keys. Finally we do some actual crypto operatons via pkcs11, OpenSSH, Apache and OpenSSL. We also cover usage in Thunderbird (S/MIME), Elementary Files (EF), a Web cluster with Apache and mod_nss and the decryption of the keys.
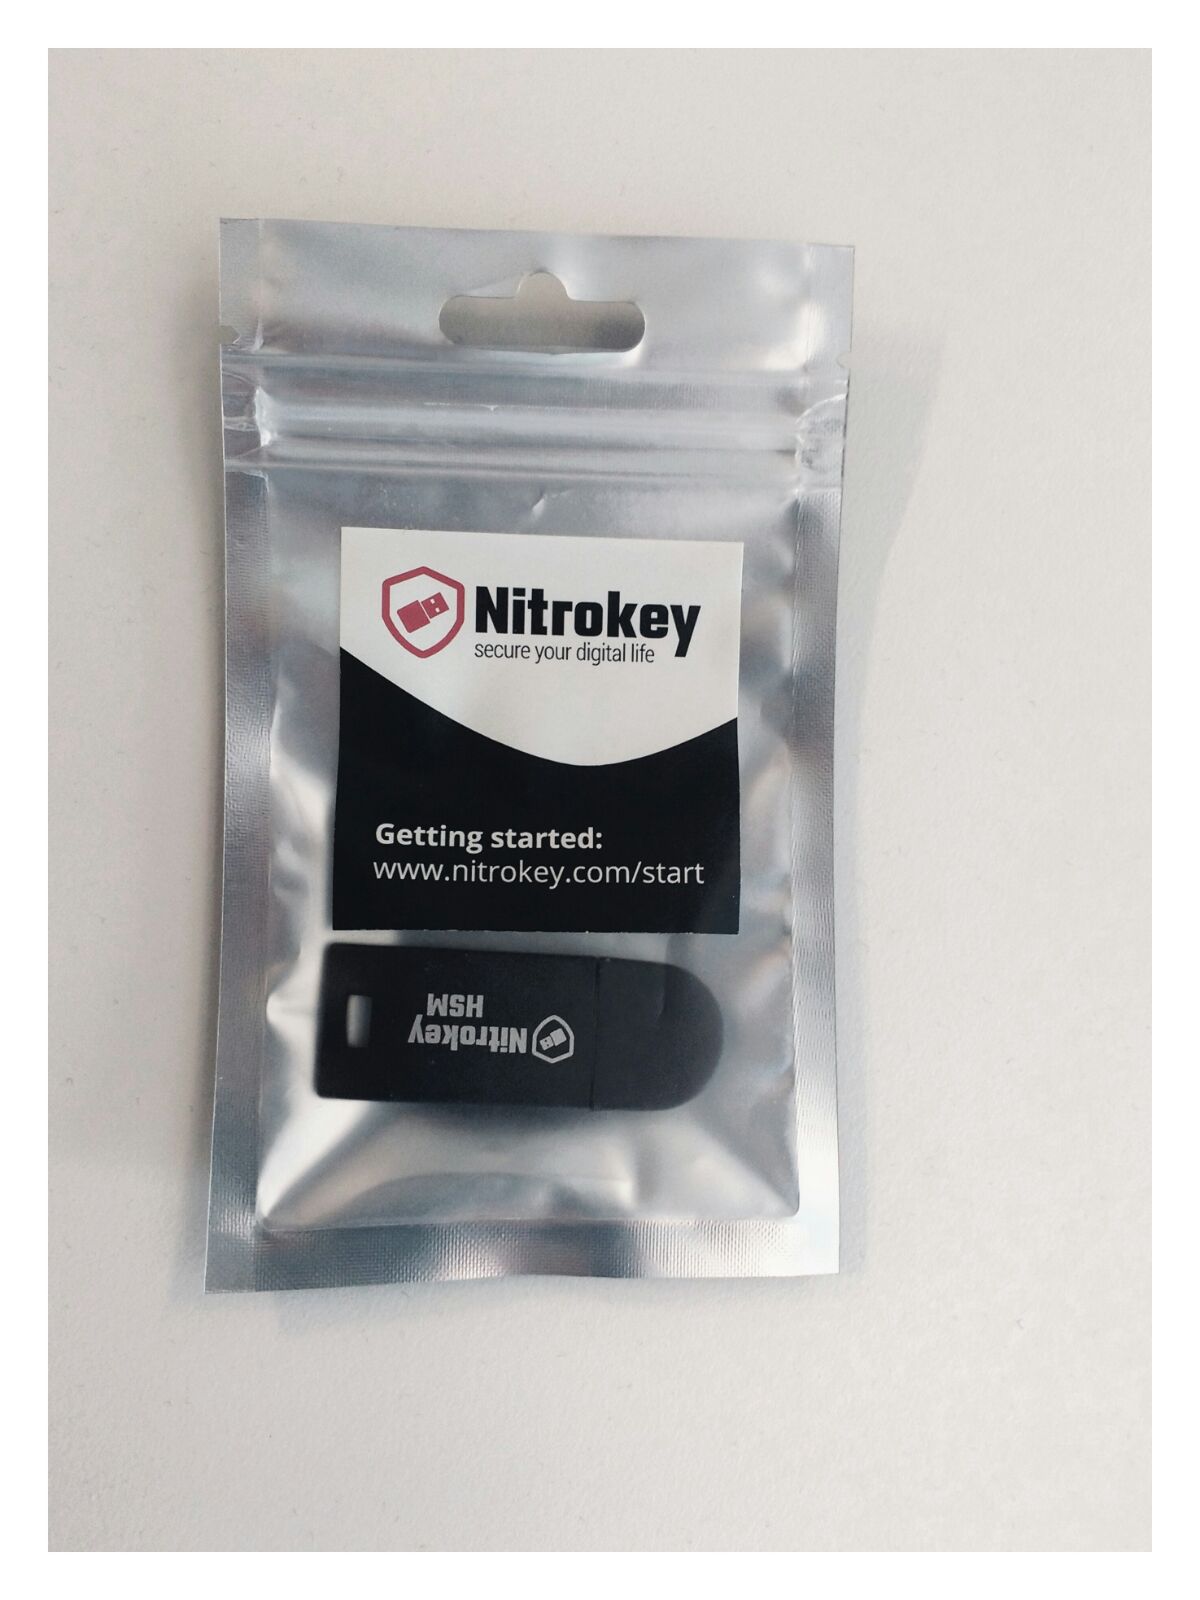
The Nitrokey HSM in a sealed package
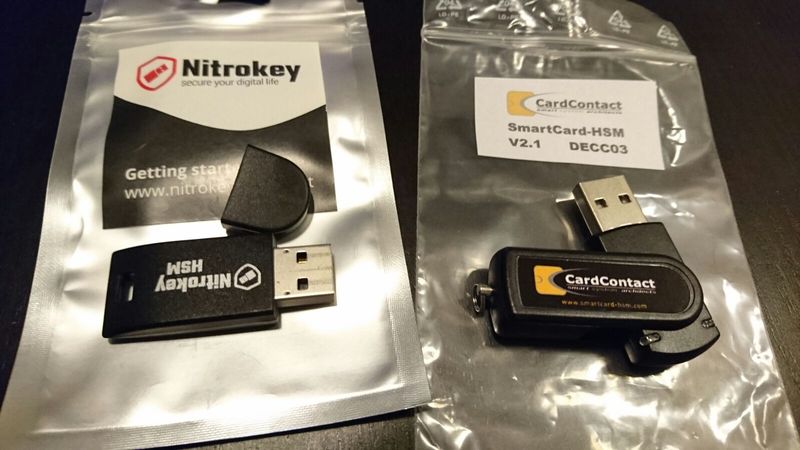
The Nitrokey HSM and the SmartCard-HSM
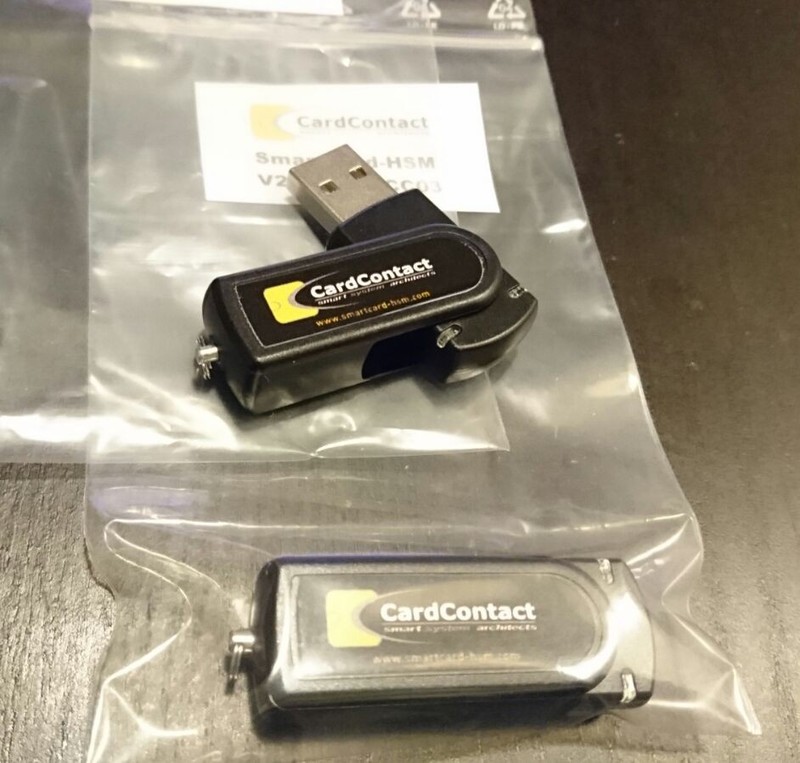
The SmartCard-HSM
Changelog
2021-06-20
Jan-Piet Mens has written an article on using the HSM with OpenSSH
and EC keys. When I wrote this article, OpenSSH PKCS#11 had no
support, he has figured out how to get it working. It does involve
compiling your own (newer) OpenSSH build. Article is here: https://jpmens.net/2021/06/16/ssh-with-a-smartcard-hsm/.
What is an HSM (Hardware Security Module)
A Hardware Security Module, HSM, is a device where secure key material is stored. This private data only be accessed by the HSM, it can never leave the device. Most HSM devices are also tamper-resistant. This means that when opened, moved or otherwise (software) tampered with, they wipe the key material. HSM's come in a variety of formfactors, ranging from SmartCards and small USB devices, to full size PCI cards and even 19" rackmountable server-like devices. The difference between all those devices is speed and storage capacity. Most commercial HSM's are certified to the FIPS-140-2 standard.

An Eracom HSM PCI card
Since the private key material never leaves the device, all crypto operations
are done on the device as well. The software usually communicates via
PKCS#11, sometimes named Cryptoki. PKCS#11 is a software API for
accessing cryptographic hardware like smart cards or HSM. PKCS#11 is NOT a
hardware standard or hardware interface. PKCS#15 is a format of on-card
structures that defines a "filesystem layout" for smart cards. PKCS#15 does not
define how those structures are generated or written to the card. OpenSSL
supports this, as well as CA software like Dogtag/Redhat Certificate System
and EJBCA by using a driver/module. The software doesn't use the actual key
files themselves but asks the device to do the operation. For example, the
software asks the HSM to sign this data with the private key and the HSM returns
the signed data. It can also encrypt and decrypt data using the keys. In most
HSM's you have one or more so called slots. Each slot can have a keypair, RSA,
EC, DSA, depending on the software on the HSM.
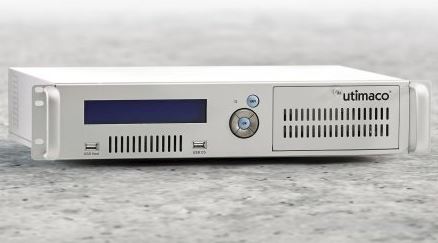
An Ultimaco HSM device
For example, when you generate a certificate for your website with OpenSSL you get both a private key and a certificate. The latter might also be called the public key (RSA). By using the public key, others can verify that the connection is signed and encrypted with the private key. The server software, Apache for example, uses the two files directly to do the crypto. Now, when a HSM is used, the webserver has a driver loaded and asks the HSM to do the operation (signing, encrypting) instead of doing it itself. It uses the data the HSM returned, and thus never has access to the private key.
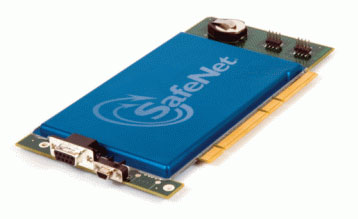
An SafeNet Luna PCI 7000 HSM
All major Certificate Authorities use HSM's to store their private keys. By doing so, they make sure the private keys used to sign certificates never get stolen or leak out. Let's Encrypt uses Gemalto HSM's. I've worked at a dutch certificate authority where Safenet Protectserver devices were used. Actually, Eracom Protectserver, before they got bought up, then Safenet Protectserver. For this dutch CA, it was required to store keying material in an HSM by the CA/Browser forum and the Staat Der Nederlanden CA hierarchy, PKIOverheid. A company doing public traffic transaction management (OV Chipkaart) uses devices by Thales, nShield HSM's.
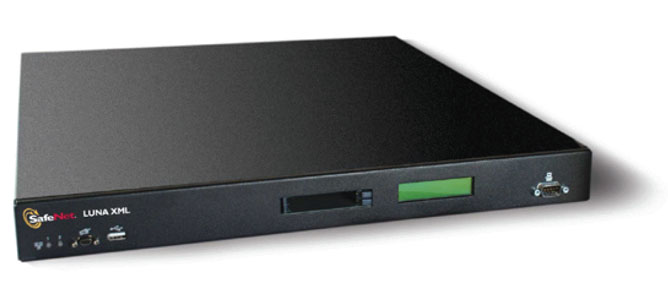
An SafeNet Luna 19" rack model HSM
As you can see on the pictures, most HSM's have a COM port. These COM ports can be used to attach a smartcard reader. Most HSM's offer the option to backup the keying material inside the HSM to a smartcard.
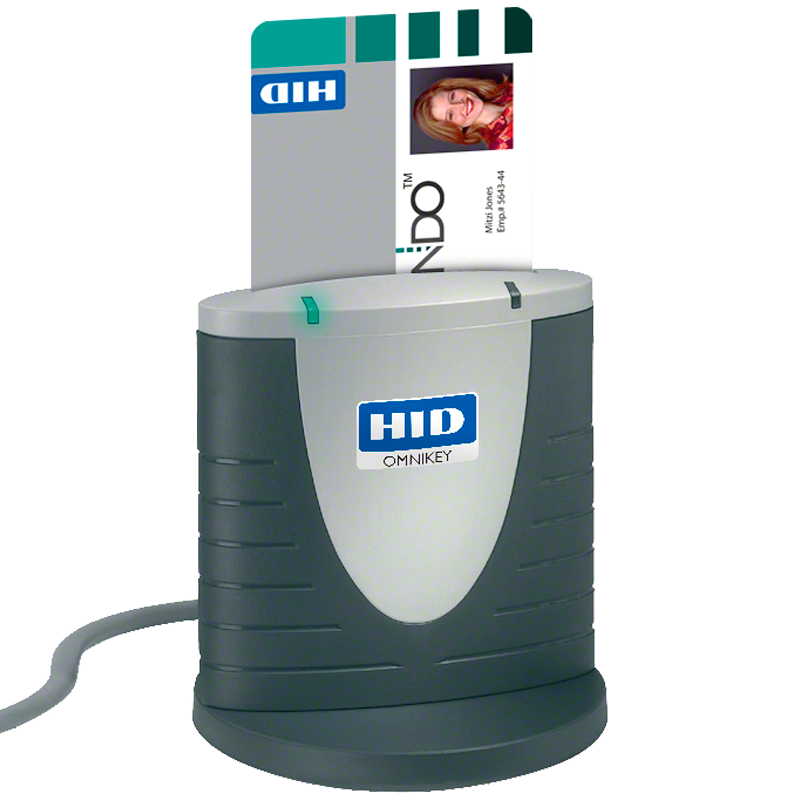
An Omnikey 3121 USB Smartcard reader
These backups are made in such a way that only another HSM, often only the same type of HSM device, can import these keys with a special password. The Safenet Protectservers called this a Transport Key, which was a long (32 bit) password used to export and import the key.
Nitrokey and SmartCard HSM
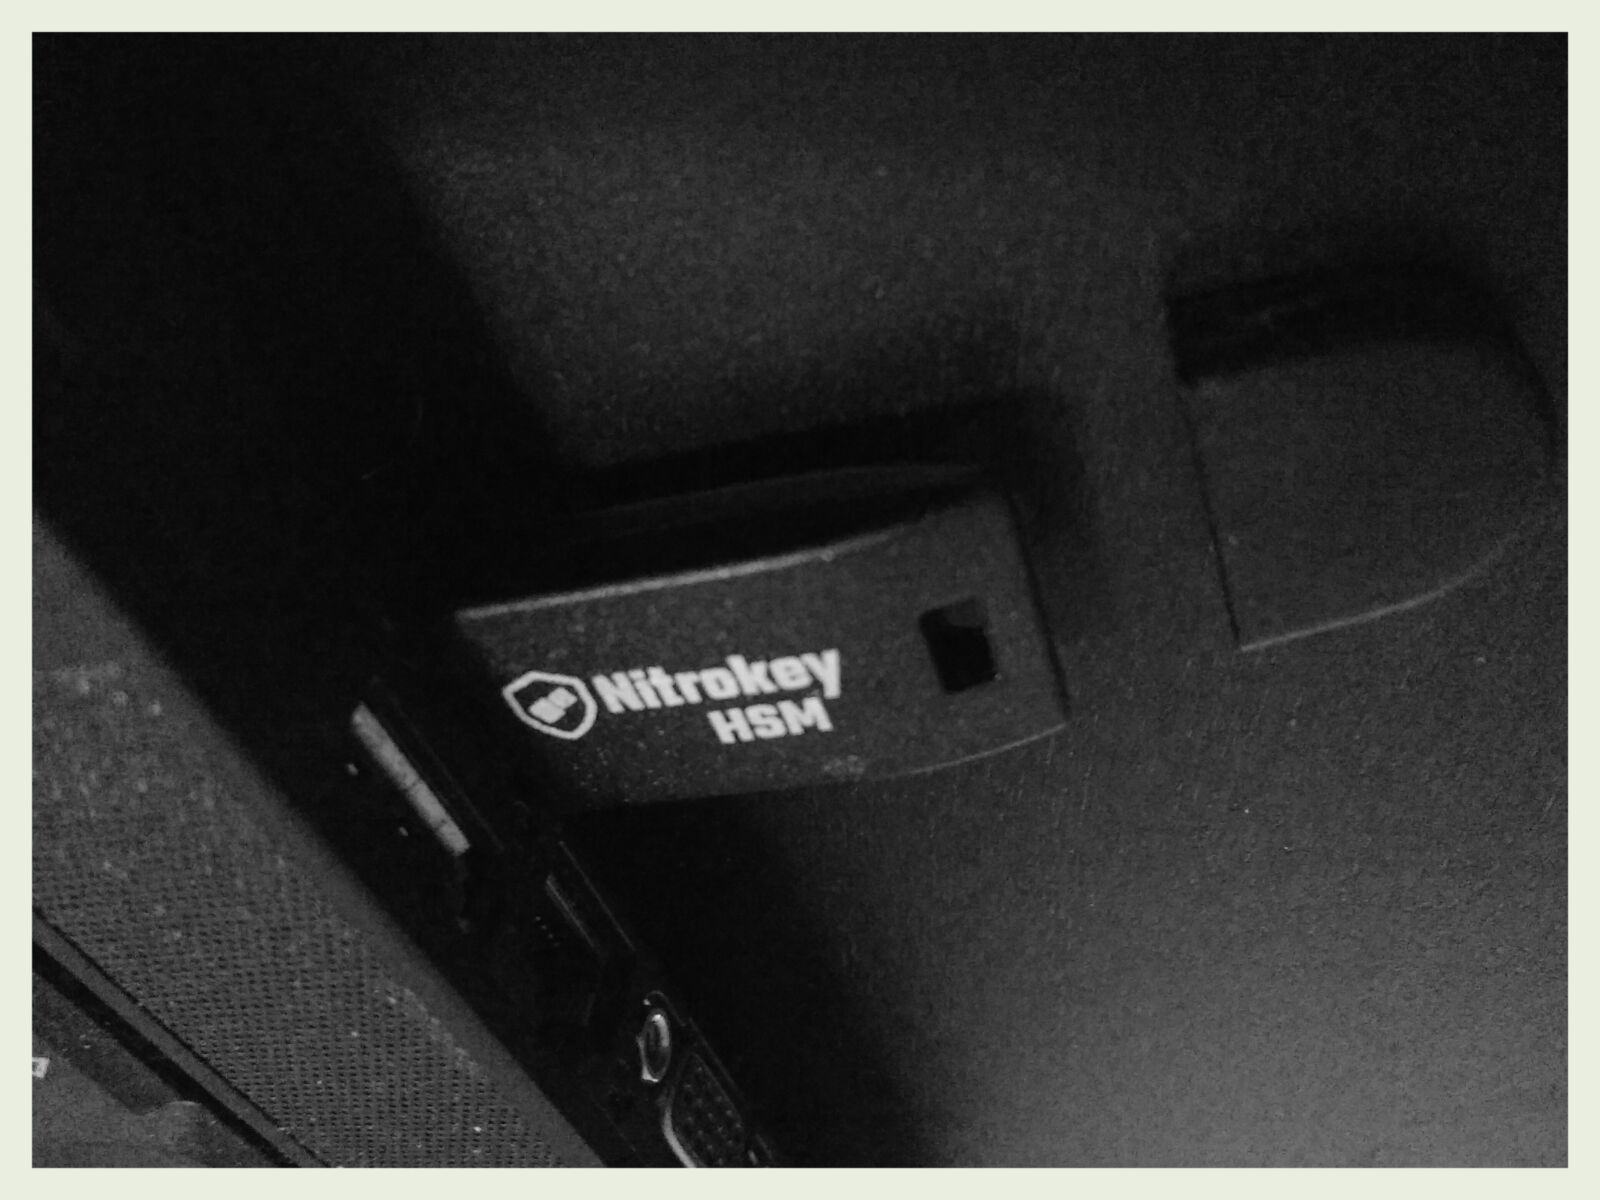
The Nitrokey HSM plugged into my ThinkPad
The Nitrokey HSM is an open hardware and open software device. It is a USB version of the SmartCard-HSM. Both the SmartCard-HSM as the Nitrokey HSM have sources available and are fully supported by the OpenSC project.
The Nitrokey is as far as I know one of the few fully open source devices. All the big HSM's I've used were either under NDA or completely closed source. In my opinion a device like this can only be secure when they are open source. The device supports up to 60 ECC GF(p) 256-bit keys and up to 48 RSA 2048-bit keys.
The device came in a sealed bag. The bag has only the device in it and a link to www.nitrokey.com/start printed on it. The size is about that of an AA battery in height and around 1.5 cm width. It is black, the back has the FCC and CE logo's printed in white and the front has the Nitrokey logo and the text "Nitrokey HSM" printed. The device feels like a quality product and is very sturdy. Inserting the device in a USB port also keeps it secure and still, it all fits very well. Not loose or wiggly at all. When the device is inserted a red LED blinks once.
Do note that I'm not sponsored nor endorsed by Nitrokey or CardContact. If you like this article, consider sponsoring me by trying out a Digital Ocean VPS. With this link you'll get a $5 VPS for 2 months free (as in, you get $10 credit). (referral link)
Software installation
On Arch Linux you need to install the following packages:
pacman -Sy ccid opensc pcsc-tools
Afterwards you need to start the pcscd service:
systemctl enable pcscd
systemctl start pcscd
If you forgot to do so and already insterted the HSM, remove it, start pcscd and plug the device back in.
See the Arch Wiki for more information.
On Ubuntu you need to install some software as well:
apt-get install ccid pcscd pcsc-tools
See the Ubuntu Wiki for more info.
After you've installed all the software and started services, plug the device in and check if it all went well.
dmesg output when inserting the device:
[701858.879567] usbhid: USB HID core driver
[701858.890463] input: Nitrokey Nitrokey HSM as /devices/pci0000:00/0000:00:1a.0/usb1/1-1/1-1.1/1-1.1:1.0/0003:20A0:4230.0001/input/input20
[701858.942115] hid-generic 0003:20A0:4230.0001: input,hidraw0: USB HID v1.10 Keyboard [Nitrokey Nitrokey HSM] on usb-0000:00:1a.0-1.1/input0
pcsc_scan output on my laptop which also has a built-in Lenovo cardreader:
# pcsc_scan
PC/SC device scanner
V 1.4.26 (c) 2001-2011, Ludovic Rousseau <ludovic.rousseau@free.fr>
Compiled with PC/SC lite version: 1.8.16
Using reader plug'n play mechanism
Scanning present readers...
0: Nitrokey Nitrokey HSM (010000000000000000000000) 00 00
1: Lenovo Integrated Smart Card Reader 01 00

Fri Jun 17 19:55:36 2016
Reader 0: Nitrokey Nitrokey HSM (010000000000000000000000) 00 00
  Card state: Card inserted,
opensc-tool output:
# opensc-tool --list-readers
# Detected readers (pcsc)
Nr.  Card  Features  Name
0    Yes             Nitrokey Nitrokey HSM (010000000000000000000000) 00 00
1    No              Lenovo Integrated Smart Card Reader 01 00
If you get no output but an error like:
No smart card readers found.
It might mean that pcscd is not running. Make sure it's started.
You can check the exact hardware and software revision of the device using the
pkcs11-tool --list-slots command:
# pkcs11-tool --list-slots
Available slots:
Slot 0 (0xffffffffffffffff): Virtual hotplug slot
  (empty)
Slot 1 (0x1): Lenovo Integrated Smart Card Reader 00 00
  (empty)
Slot 2 (0x5): Nitrokey Nitrokey HSM (010000000000000000000000) 01 00
  token label        : SmartCard-HSM (UserPIN)
  token manufacturer : www.CardContact.de
  token model        : PKCS#15 emulated
  token flags        : rng, login required, PIN initialized, token initialized
  hardware version   : 24.13
  firmware version   : 2.0
  serial num         : DENK0100186
PKCS#11, #15 and OpenSC
PKCS#11 is, as said, a software API for accessing cryptographic hardware like smart cards or HSM. PKCS#11 is NOT a hardware standard or hardware interface. PKCS#15 is a format of on-card structures that defines a "filesystem layout" for smart cards. PKCS#15 does not define how those structures are generated or written to the card.
SO and User Pins
Some functions on the HSM are protected by PIN codes. There are different access levels, most common SO (security officer) and user. Each slot can have a different user pin, but the SO pin remains the same for the HSM. You could say that the SO pin is like the root user.
An HSM needs to be initialized before it can be used. Initialization is a
factory reset, where all keys, certificates and data elements are erased and you
set up a new SO pin. When you receive an HSM it has factory default settings.
For the Nitrokey HSM the SO pin is 3537363231383830. This is not secure since
it's a publicly known code. Therefore it needs to be changed to something else.
But before we do that, first a few warnings.
Warnings
Please read the below parts. You might render your device bricked if you use it wrong, and there is no way of recovering a blocked/bricked Nitrokey HSM.
- The SO pin must be exactly 16 hexadecimal characters. It will be stored internally as an 8-byte key.
- Store the SO pin in a safe place.
- The user pin can be any length from 4 up to 16 ASCII characters.
- You need the SO pin to (re)-initialize the device.
- Wrong SO pins are counted. When you have entered 15 wrong SO pins, the device is forever blocked and unusable. This is non-recoverable. The counter can not be reset as well.
- HSM firmware versions up to 1.0 will not allow you to change this SO PIN ever again. Check with
pkcs11-tool --list-slots.
So, TL;DR: NEVER ENTER THE WRONG SO PIN AND NEVER FORGET THE SO PIN.
HSM Backups with a DKEK
As said earlier, most HSM's offer a backup option. You can export the key material in a specific format readably by other HSM's of that type. The Safenet Protectserver wraps the material with a Transport Key.
The Nitrokey HSM and the SmartCard-HSM use a 'Device Key Encryption Key'. The DKEK is a 256-Bit AES key.
The DKEK must be set during initialization and before any other keys are generated. For a device initialized without a DKEK, keys can never be exported.
A DKEK is imported into a SmartCard-HSM using a preselected number of key shares. Each key share is given to a key custodian and only all key shares together assemble the DKEK. Key shares are individually imported and are assembled within the SmartCard-HSM. Key shares can be imported independently of time and location, allowing to pass a half-initialized device between key custodians until all shares have been imported.
The HSM supports an arbitrary number of DKEK shares. Typical values for the number of shares are:
- 0: The HSM generates an internal DKEK (no backups).
- 1: The HSM requests one external DKEK share to be imported.
- 3: The HSM requests three external DKEK shares to be imported by three different key custodians.
If you want to enable the option to create a backup, you must do so first, before initializing the HSM. In this example I will create one key share, but repeating the commands allows you to create more.
Create a DKEK share with the following command:
sc-hsm-tool --create-dkek-share dkek-share-1.pbe
Output:
Using reader with a card: Nitrokey Nitrokey HSM (010000000000000000000000) 00 00

The DKEK share will be enciphered using a key derived from a user supplied password.
The security of the DKEK share relies on a well chosen and sufficiently long password.
The recommended length is more than 10 characters, which are mixed letters, numbers and
symbols.

Please keep the generated DKEK share file in a safe location. We also recommend to keep a
paper printout, in case the electronic version becomes unavailable. A printable version
of the file can be generated using "openssl base64 -in <filename>".
Enter password to encrypt DKEK share : <long password>

Please retype password to confirm :

Enciphering DKEK share, please wait...
DKEK share created and saved to dkek-share-1.pbe
The printable version looks like this:
# openssl base64 -in dkek-share-1.pbe
U2FsdGVkX19TK+VuViUAPOKAfVPE9puwK7yvJSInvPeBSld+Uh2hHli8RazbFVd3
dGgOu7ahEjm6YzzYWtxMnA==
For testing purposes, the password used above is: 123456789.
Create more key shares if needed.
Initialize the HSM
The following command initializes the HSM. The default SO pin for the Nitrokey
HSM is 3537363231383830. The initialization will be done with one DKEK share
as described above.
Use the following command to initialize the HSM. If you have a different SO pin, please change the command. The user pin we provide will be set as the user pin.
sc-hsm-tool --initialize --so-pin 3537363231383830 --pin 648219 --dkek-shares 1
Output:
Using reader with a card: Nitrokey Nitrokey HSM (010000000000000000000000) 00 00
The card is not initialized yet if you enabled DKEK shares. You can check how many DKEK shares need to be imported using the below command:
# sc-hsm-tool
Output:
Using reader with a card: Nitrokey Nitrokey HSM (010000000000000000000000) 00 00
Version              : 2.0
User PIN tries left  : 3
DKEK shares          : 1
DKEK import pending, 1 share(s) still missing
Import the share(s) with the following command:
# sc-hsm-tool --import-dkek-share dkek-share-1.pbe
Output:
Using reader with a card: Nitrokey Nitrokey HSM (010000000000000000000000) 00 00
Enter password to decrypt DKEK share : <long password>

Deciphering DKEK share, please wait...
DKEK share imported
DKEK shares          : 1
DKEK key check value : 53CA37CEED5B227F
The HSM is initialized now:
# sc-hsm-tool
Output:
Using reader with a card: Nitrokey Nitrokey HSM (010000000000000000000000) 00 00
Version              : 2.0
User PIN tries left  : 3
DKEK shares          : 1
DKEK key check value : 53CA37CEED5B227F
Now that the HSM is initialized, we can start using it.
Create a keypair
The HSM supports the following key types:
RSA:
- 1024 bit
- 2048 bit
ECDSA GF(p) 192-320 bit, elliptic curves:
- secp192r1 (aka prime192v1)
- secp256r1 (aka prime256v1)
- brainpoolP192r1
- brainpoolP224r1
- brainpoolP256r1
- brainpoolP320r1
- secp192k1
- secp256k1 (the Bitcoin curve)
Use the below command to generate an 2048 bit RSA keypair in the HSM:
pkcs11-tool --module opensc-pkcs11.so --login --pin 648219 --keypairgen --key-type rsa:2048 --id 10 --label "HSM RSA Key Remy"
Output:
Using slot 1 with a present token (0x1)
Logging in to "SmartCard-HSM (UserPIN)".
Key pair generated:
Private Key Object; RSA
  label:      HSM RSA Key Remy
  ID:         10
  Usage:      decrypt, sign, unwrap
Public Key Object; RSA 2048 bits
  label:      HSM RSA Key Remy
  ID:         10
  Usage:      encrypt, verify, wrap
If you want to generate an EC key, you can do that as well:
pkcs11-tool --module opensc-pkcs11.so -l --keypairgen --key-type EC:prime256v1 --id 20 --label "HSM EC Key Remy"
Output:
Using slot 1 with a present token (0x1)
Logging in to "SmartCard-HSM (UserPIN)".
Please enter User PIN:
Key pair generated:
Private Key Object; EC
  label:      HSM EC Key Remy
  ID:         20
  Usage:      sign, derive
Public Key Object; EC  EC_POINT 256 bits
  EC_POINT:   044104a98140c570507d0fcd9e0d3bbe2b2eea22a591b5b1862a700d1bddfebd85b3708744c870da457f45c23bef634a941ab344b933a74bbf8e3772b77150afcc4f08
  EC_PARAMS:  06082a8648ce3d030107
  label:      HSM EC Key Remy
  ID:         20
  Usage:      verify
You can save more than one key by specifying a different ID. You can list all the current objects as well:
# pkcs11-tool --list-objects
Output:
Using slot 1 with a present token (0x1)
Public Key Object; RSA 2048 bits
  label:      HSM RSA Key Remy
  ID:         10
  Usage:      none
Public Key Object; EC  EC_POINT 256 bits
  EC_POINT:   044104a98140c570507d0fcd9e0d3bbe2b2eea22a591b5b1862a700d1bddfebd85b3708744c870da457f45c23bef634a941ab344b933a74bbf8e3772b77150afcc4f08
  EC_PARAMS:  06082a8648ce3d030107
  label:      HSM EC Key Remy
  ID:         20
  Usage:      none
You can use the test option as well to make sure everything works correctly:
pkcs11-tool --test --login --pin 648219
Output:
Using slot 1 with a present token (0x1)
C_SeedRandom() and C_GenerateRandom():
  seeding (C_SeedRandom) not supported
  seems to be OK
Digests:
  all 4 digest functions seem to work
  MD5: OK
  SHA-1: OK
  RIPEMD160: OK
Signatures (currently only RSA signatures)
  testing key 0 (HSM RSA Key Remy)
  all 4 signature functions seem to work
  testing signature mechanisms:
    RSA-X-509: OK
    RSA-PKCS: OK
    SHA1-RSA-PKCS: OK
    MD5-RSA-PKCS: OK
    RIPEMD160-RSA-PKCS: OK
    SHA256-RSA-PKCS: OK
warning: PKCS11 function C_GetAttributeValue(MODULUS_BITS) failed: rv = CKR_ATTRIBUTE_TYPE_INVALID (0x12)

  testing key 1 (0 bits, label=HSM EC Key Remy) with 1 signature mechanism -- can't be used to sign/verify, skipping: can't obtain modulus
Verify (currently only for RSA):
  testing key 0 (HSM RSA Key Remy)
    RSA-X-509: OK
    RSA-PKCS: OK
    SHA1-RSA-PKCS: OK
    MD5-RSA-PKCS: OK
    RIPEMD160-RSA-PKCS: OK
  testing key 1 (HSM EC Key Remy) with 1 mechanism
warning: PKCS11 function C_GetAttributeValue(MODULUS_BITS) failed: rv = CKR_ATTRIBUTE_TYPE_INVALID (0x12)

 -- can't get the modulus length, skipping
Unwrap: not implemented
Decryption (RSA)
  testing key 0 (HSM RSA Key Remy)
    RSA-X-509: OK
    RSA-PKCS: OK
  testing key 1 (HSM EC Key Remy)  -- can't be used to decrypt, skipping
No errors
Backing up and restoring the keys with a DKEK
Now that we have some keys in the HSM, we want to make a backup. Since we've generated a DKEK earlier, we can use that to create a backup of the material in the HSM. If you are restoring a backup to another HSM, make sure you (re)initialize the HSM and import the correct DKEK first.
The backup and restore require that we know the key reference identifier (key
ref). We can find that with the pkcs15-dump command:
pkcs15-tool --dump
Output:
Using reader with a card: Nitrokey Nitrokey HSM (010000000000000000000000) 00 00
PKCS#15 Card [SmartCard-HSM]:
  Version        : 0
  Serial number  : DENK0100186
  Manufacturer ID: www.CardContact.de
  Flags          :

[...]

Private RSA Key [HSM RSA Key Remy]
  Object Flags   : [0x3], private, modifiable
  Usage          : [0x2E], decrypt, sign, signRecover, unwrap
  Access Flags   : [0x1D], sensitive, alwaysSensitive, neverExtract, local
  ModLength      : 2048
  Key ref        : 1 (0x1)
  Native         : yes
  Path           : e82b0601040181c31f0201::
  Auth ID        : 01
  ID             : 10
  MD:guid        : {984bcc96-6524-74f8-535a-83c920612f39}
    :cmap flags  : 0x0
    :sign        : 0
    :key-exchange: 0

Private EC Key [HSM EC Key Remy]
  Object Flags   : [0x3], private, modifiable
  Usage          : [0x10C], sign, signRecover, derive
  Access Flags   : [0x1D], sensitive, alwaysSensitive, neverExtract, local
  FieldLength    : 256
  Key ref        : 2 (0x2)
  Native         : yes
  Path           : e82b0601040181c31f0201::
  Auth ID        : 01
  ID             : 20
  MD:guid        : {5c924cee-37e3-865e-951b-975cfaf95cad}
    :cmap flags  : 0x0
    :sign        : 0
    :key-exchange: 0

[...]
In my example the RSA keypair has key ref 1 and the EC keypair has key ref 2. To wrap key 1 to an encrypted file use the following command:
sc-hsm-tool --wrap-key wrap-key-1.bin --key-reference 1 --pin 648219
To restore the key, use the unwap command:
sc-hsm-tool --unwrap-key wrap-key-1.bin --key-reference 1 --pin 648219
Replace the key ref to backup other keys.
We can test the backup by, after creating a backup first, deleting the key material in the slot:
pkcs11-tool --module opensc-pkcs11.so --login --pin 648219 --delete-object --type cert --id 10
pkcs11-tool --module opensc-pkcs11.so --login --pin 648219 --delete-object --type privkey --id 10
pkcs11-tool --module opensc-pkcs11.so --login --pin 648219 --delete-object --type data --label "HSM RSA Key Remy"
If you use the pkcs15-tool --dump command or the pkcs11-tool --list-objects
command you see that the key is gone:
pkcs11-tool --list-objects
Output:
Using slot 1 with a present token (0x1)
Public Key Object; EC  EC_POINT 256 bits
  EC_POINT:   044104a98140c570507d0fcd9e0d3bbe2b2eea22a591b5b1862a700d1bddfebd85b3708744c870da457f45c23bef634a941ab344b933a74bbf8e3772b77150afcc4f08
  EC_PARAMS:  06082a8648ce3d030107
  label:      HSM EC Key Remy
  ID:         20
  Usage:      none
Restore the key using the above command and it should be back:
sc-hsm-tool --unwrap-key wrap-key-1.bin --key-reference 1 --pin 648219
Output:
Using reader with a card: Nitrokey Nitrokey HSM (010000000000000000000000) 00 00
Wrapped key contains:
  Key blob
  Private Key Description (PRKD)
  Certificate
Key successfully imported
The restore worked, the key is back an can be used again:
pkcs11-tool --list-objects
Output:
Using slot 1 with a present token (0x1)
Public Key Object; RSA 2048 bits
  label:      HSM RSA Key Remy
  ID:         10
  Usage:      none
Public Key Object; EC  EC_POINT 256 bits
  EC_POINT:   044104a98140c570507d0fcd9e0d3bbe2b2eea22a591b5b1862a700d1bddfebd85b3708744c870da457f45c23bef634a941ab344b933a74bbf8e3772b77150afcc4f08
  EC_PARAMS:  06082a8648ce3d030107
  label:      HSM EC Key Remy
  ID:         20
  Usage:      none
Using the keys
You can get the public keys out of the device by using the pkcs15-tool
command:
# pkcs15-tool --read-public-key 10
Output:
Using reader with a card: Nitrokey Nitrokey HSM (010000000000000000000000) 00 00
-----BEGIN PUBLIC KEY-----
MIIBIjANBgkqhkiG9w0BAQEFAAOCAQ8AMIIBCgKCAQEAzmCaH0j9ujAo83EIZBlK
U7rJGcoKd4l93HJd7flufUlrwN7QaGuyzO4scgUps97fgWFML7ZIn1RJaJBIPExb
Mh9dHRlxsAmJoPNmiqFD86wbegRZJsvsfe/HlEZDUuDa25Ef52cOLipetJ7dUWP8
rsXART+7Ferl9yjMEMcfciaTPGuyo5V1Jvk1xh7DR5pMk0YGk5ZZVbIha79Ya8ut
gj3nxR58Je63iHcY9RGpb/96UpRKJ2D98LCTQKPUZvF6wY3PPkWroLdZIvwZGd3D
HgSw/bw9nFTgMXHbvw/xJ2B4aDmnRlY27gKzMXicEEbEqZcuMWVOKaatcaD+kmOV
cQIDAQAB
-----END PUBLIC KEY-----
EC Key:
# pkcs15-tool --read-public-key 20
Output:
Using reader with a card: Nitrokey Nitrokey HSM (010000000000000000000000) 00 00
-----BEGIN PUBLIC KEY-----
MFkwEwYHKoZIzj0CAQYIKoZIzj0DAQcDQgAEqYFAxXBQfQ/Nng07visu6iKlkbWx
hipwDRvd/r2Fs3CHRMhw2kV/RcI772NKlBqzRLkzp0u/jjdyt3FQr8xPCA==
-----END PUBLIC KEY-----
To use the HSM with OpenSSL we need to create a config file first. Plate the
contents of the below file in, for example, hsm.conf:
# PKCS11 engine config
openssl_conf = openssl_def

[openssl_def]
engines = engine_section

[req]
distinguished_name = req_distinguished_name

[req_distinguished_name]
# empty.

[engine_section]
pkcs11 = pkcs11_section

[pkcs11_section]
engine_id = pkcs11
dynamic_path = /usr/lib/engines/engine_pkcs11.so
MODULE_PATH = /usr/lib/opensc-pkcs11.so
PIN = 648219
init = 0
You can omit the PIN variable if you don't want to include that in a config
file. I had to check the filenames in /usr/lib/engines/ to make sure that the
correct one was loaded. Test it using OpenSSL:
OPENSSL_CONF=./hsm.conf openssl engine
Output:
(dynamic) Dynamic engine loading support
(pkcs11) pkcs11 engine
We can create a new certificate signing request, The 1:10 is a form of
slotid:keyid.
OPENSSL_CONF=./hsm.conf openssl req -engine pkcs11 -keyform engine -new -key 1:10 -sha256 -out "raymii.org.csr" -subj "/C=NL/ST=Zuid Holland/L=Rotterdam/O=Sparkling Network/OU=IT Dept/CN=raymii.org"
Change the parameters to fit your subject. You can send this CSR to a CA to get it signed, but you can also generate a self signed certificate:
OPENSSL_CONF=./hsm.conf openssl req -engine pkcs11 -keyform engine -new -key 1:10 -nodes -days 3560 -x509 -sha256 -out "raymii.org.pem" -subj "/C=NL/ST=Zuid Holland/L=Rotterdam/O=Sparkling Network/OU=IT Dept/CN=raymii.org"
The difference in the last command is that the -nodes, -x509 and -days
parameters are added, which generate a self singed certificate instead of a CSR.
You can view the CSR with the following command:
openssl req -noout -text -in raymii.org.csr
Output:
Certificate Request:
    Data:
        Version: 0 (0x0)
        Subject: C=NL, ST=Zuid Holland, L=Rotterdam, O=Sparkling Network, OU=IT Dept, CN=raymii.org
        Subject Public Key Info:
            Public Key Algorithm: rsaEncryption
                Public-Key: (2048 bit)
[...]
You can view the self signed certificate with the following command:
openssl x509 -noout -text -in raymii.org.pem
Output:
Certificate:
    Data:
        Version: 1 (0x0)
        Serial Number: 18137581533109102111 (0xfbb5a24eada7261f)
    Signature Algorithm: sha256WithRSAEncryption
        Issuer: C=NL, ST=Zuid Holland, L=Rotterdam, O=Sparkling Network, OU=IT Dept, CN=raymii.org
        Validity
            Not Before: Jun 18 09:26:45 2016 GMT
            Not After : Mar 18 09:26:45 2026 GMT
        Subject: C=NL, ST=Zuid Holland, L=Rotterdam, O=Sparkling Network, OU=IT Dept, CN=raymii.org
        Subject Public Key Info:
            Public Key Algorithm: rsaEncryption
                Public-Key: (2048 bit)
[...]
Sadly, both Apache and NGINX do not support PKCS#11 in their ssl module. For
Apache you can use mod_nss to use the certificates from the HSM.
You can however use the HSM to encrypt and decrypt data. Please read my article on encryption with OpenSSL first since that covers basics like why an RSA key is not suitable for large files.
I've also written an article on Signing data with OpenSSL. Read that as well.
To encrypt data using your HSM public key (which we exported earlier with
pkcs15-tool --read-public-key 10), use the following command:
openssl rsautl -inkey publickey.pem -pubin -encrypt -pkcs -in smallfile -out encryptedsmallfile.pkcs1
The data will be wrapped in a PKCS#1 (binary) format.
If you want to decrypt the data, use the following command:
pkcs15-crypt --decipher --key 10 --input encryptedsmallfile.pkcs1 --pkcs1 --raw > decryptedsmallfile
Output:
Using reader with a card: Nitrokey Nitrokey HSM (010000000000000000000000) 00 00
Enter PIN [UserPIN]: <648219>
The two files should be the same:
$ sha256sum decryptedsmallfile
609ac352197628e57552aac9e66562be9bb8d746826107e15ff4b04e0efdcbdb  decryptedsmallfile

$ sha256sum smallfile
609ac352197628e57552aac9e66562be9bb8d746826107e15ff4b04e0efdcbdb  smallfile
As described in the two articles, you need to create a small random file and use that as the key to encrypt a file using symmetric encryption. asymmetric encryption like RSA is not suitable for large files. Please make sure you read both the articles to understand the subject, and then use this article to use the HSM.
SSH Keys with the HSM
OpenSSH has support for PKCS#11, so we can use the HSM for SSH Key based authentication. The private key never leaves the HSM so this is more secure than a password on a file. You will know when someone is brute forcing your HSM, because you lost possession of it. When someone steals your private key, you might not even know it. Remember the firefox exploit that steals private keys and passwords? If you are using the HSM this will never be possible.
It's best to create a seperate key for SSH:
pkcs11-tool --module opensc-pkcs11.so --login --pin 648219 --keypairgen --key-type rsa:2048 --id 30 --label "HSM SSH Key Remy"
Output:
Using slot 1 with a present token (0x1)
Logging in to "SmartCard-HSM (UserPIN)".
Key pair generated:
Private Key Object; RSA
  label:      HSM SSH Key Remy
  ID:         30
  Usage:      decrypt, sign, unwrap
Public Key Object; RSA 2048 bits
  label:      HSM SSH Key Remy
  ID:         30
  Usage:      encrypt, verify, wrap
We need to use pkcs15-tool to get the public key in a format usable by
openSSH. 30 is the ID we gave, you might need to use the pkcs15-tool --dump
command to lookup the ID if you don't know it.
pkcs15-tool --read-ssh-key 30
Output:
Using reader with a card: Nitrokey Nitrokey HSM (010000000000000000000000) 00 00
ssh-rsa AAAAB3NzaC1yc2EAAAADAQABAAABAQC/HG1cG6ecGnadde9g4aZCWuL1dzsgOKUstyP7yUAclEtd1GwgQKSrVPixp7jllvoW0kCCtvsT8JMV+pEytcenOpfO06n4DvqjJ1aNMqQK6xw3CeJXz1TXJe7Z7L722/w96bHioZuSRBWumAAcGUoANd/WQ3MXNAmocgvW/WGSnl3kb9Vif7hzirecmcFSaU3djeEXpu42wZG6GGdw9WlvrXV1AsrE0mLQxyZmCEOs6CF0/cyaHuUE24Jz6oOfKkeYjCQgvBUK0D1MU3odnisbvfVLGJuF9RPMBY20Hey8z6dUXQV2WMeknV9/vN2n7Nk7pxOSViIQQ3w9rc7y1f4J HSM SSH Key Remy
EC keys to OpenSSH
For EC generated keys the pkcs15-tool doesn't seem to work. However, because
all keys can be converted one way or another we can dump the EC public key and
convert it into an SSH compatible key. First dump the EC public key to a file.
In this case I generated an EC private key with ID 2 and used the following
command to get the public key:
pkcs15-tool --read-public-key 2 > eckey.pub
Then convert the eckey.pub file into something OpenSSH can handle:
ssh-keygen -i -m PKCS8 -f eckey.pub
Output:
ecdsa-sha2-nistp256 AAAAE2VjZHNhLXNoYTItbmlzdHAyNTYAAAAIbmlzdHAyNTYAAABBBKsWLJkl1Dr7IdLPrLpCBtoEFy+qYd/fEu9Mpga1utwMbCU671NWGH3Ppo2q/tzYFq4Fm/jgRHBHFGJ5HrwL1nM= hsm
Although using that doesn't seem to work:
$ pkcs15-tool --verbose --read-ssh-key 2
Using reader with a card: Nitrokey Nitrokey HSM (010000000000000000000000) 00 00
Connecting to card in reader Nitrokey Nitrokey HSM (010000000000000000000000) 00 00...
Using card driver SmartCard-HSM.
Trying to find a PKCS#15 compatible card...
Found SmartCard-HSM!
Reading ssh key with ID '2'
And logging in fails as well with EC keys:
$ ssh -o "PKCS11Provider opensc-pkcs11.so" root@server
C_GetAttributeValue failed: 18
no keys
root@server's password:
I've raised an issue to see how to get EC keys and OpenSSH working.
Update: Unfortunately OpenSSH PKCS#11 interface does not support ECC. The
issue was updated and we now know that OpenSSH doesn't support ECC via PKCS#11.
This public key can be placed in the ~/.ssh/authorized_keys file on your
servers. I spun up a new Digital Ocean VPS to test it.
Digital Ocean automatically places the ssh key in the authorized_keys file, if you need to do that yourself you can use the following command:
echo 'ssh-rsa AAAAB3NzaC1yc2EAAAADAQABAAABAQC/HG1cG6ecGnadde9g4aZCWuL1dzsgOKUstyP7yUAclEtd1GwgQKSrVPixp7jllvoW0kCCtvsT8JMV+pEytcenOpfO06n4DvqjJ1aNMqQK6xw3CeJXz1TXJe7Z7L722/w96bHioZuSRBWumAAcGUoANd/WQ3MXNAmocgvW/WGSnl3kb9Vif7hzirecmcFSaU3djeEXpu42wZG6GGdw9WlvrXV1AsrE0mLQxyZmCEOs6CF0/cyaHuUE24Jz6oOfKkeYjCQgvBUK0D1MU3odnisbvfVLGJuF9RPMBY20Hey8z6dUXQV2WMeknV9/vN2n7Nk7pxOSViIQQ3w9rc7y1f4J HSM SSH Key Remy' >> ~/.ssh/authorized_keys
If I try to login without specifying the HSM I will be prompted for a password or be rejected:
When we tell OpenSSH to use the HSM, we get asked for the HSM pin and are logged in:
$ ssh -o "PKCS11Provider opensc-pkcs11.so" root@testdroplet
C_GetAttributeValue failed: 18
Enter PIN for 'SmartCard-HSM (UserPIN)': <648219>
Welcome to Ubuntu 16.04 LTS (GNU/Linux 4.4.0-22-generic x86_64)

 * Documentation:  https://help.ubuntu.com/

The programs included with the Ubuntu system are free software;
the exact distribution terms for each program are described in the
individual files in /usr/share/doc/*/copyright.

Ubuntu comes with ABSOLUTELY NO WARRANTY, to the extent permitted by
applicable law.

root@hsmtest:~#
If you add the below line to the top of your ~/.ssh/config file, OpenSSH will
automatically use the HSM if needed:
# vim ~/.ssh/config
PKCS11Provider opensc-pkcs11.so
A short form for the command line is the -I flag, which is the same as the
long -o flag:
ssh -I opensc-pkcs11.so root@testdroplet
You can also add the key to your ssh-agent if you happen to use an agent:
ssh-add -s opensc-pkcs11.so
Output:
Enter passphrase for PKCS#11: <648219>
Card added: opensc-pkcs11.so
The passphrase is the user pin. You can now login to machines without entering the HSM pin every time. Check all the keys in the agent with the following command:
ssh-add -l
Output:
2048 SHA256:ycaGD3Sdnt82yTnPs14uncaGDjDwEqCMOdnVM /home/remy/.ssh/id_rsa (RSA)
2048 SHA256:gRJCXat84Ad56Q8qtLxdNjswdZDFLy8w/7N3ObreV5M opensc-pkcs11.so (RSA)
2048 SHA256:eXXaUUVJzjI6rm8H9/qIB51UWhZCIp+hqi5JEhVGB40 opensc-pkcs11.so (RSA)
My own private key is in there as well as the two slots we created earlier.
When you are done, remove the key from the ssh-agent:
ssh-add -e opensc-pkcs11.so
Output:
Card removed: opensc-pkcs11.so
Using the HSM for Thunderbird with S/MIME
If you want to sign your email using S/MIME and the HSM you need to generate a keypair and a certificate. Make sure your email address is in the label:
pkcs11-tool --module opensc-pkcs11.so --login --pin 648219 --keypairgen --key-type rsa:2048 --id 40 --label "antispam@relst.nl"
Output:
Using slot 1 with a present token (0x1)
Logging in to "SmartCard-HSM (UserPIN)".
Key pair generated:
Private Key Object; RSA
  label:      antispam@relst.nl
  ID:         40
  Usage:      decrypt, sign, unwrap
Public Key Object; RSA 2048 bits
  label:      antispam@relst.nl
  ID:         40
  Usage:      encrypt, verify, wrap
Create a certficate signing request based on this key. Make sure you have the
hsm.conf file for OpenSSL loaded as we did above.
OPENSSL_CONF=./hsm.conf openssl req -engine pkcs11 -keyform engine -new -key 1:40 -sha256 -out "antispam.relst.nl.csr" -subj "/C=NL/ST=Zuid Holland/L=Rotterdam/O=Sparkling Network/OU=IT Dept/CN=relst.nl/emailAddress=antispam@relst.nl"
Note the extra emailAddress value in the certificate subject. Make sure that
the CN domain is the same as the domain in the email addres. Also make sure
you specify the correct slot:id, in our case, slot 1 and ID 40.
You can now send this certificate signing request to a certificate authority and get an actual certificate back. Comodo and Globalsign provide certificates for S/MIME.
If you want to generate a self singed certificate you can do that as well:
OPENSSL_CONF=./hsm.conf openssl req -engine pkcs11 -keyform engine -new -key 1:40 -nodes -x509 -days 3650 -sha256 -out "antispam.relst.nl.pem" -subj "/C=NL/ST=Zuid Holland/L=Rotterdam/O=Sparkling Network/OU=IT Dept/CN=relst.nl/emailAddress=antispam@relst.nl"
I've got an actual certificate from Comodo via Xolphin, which you can inspect with the following command:
openssl x509 -noout -text -inform der -in antispam.relst.nl.pem
Output:
Certificate:
    Data:
        Version: 3 (0x2)
        Serial Number:
            ff:93:fe:11:a3:e2:c2:58:a8:b3:e9:07:cb:d5:94:2b
    Signature Algorithm: sha256WithRSAEncryption
        Issuer: C=GB, ST=Greater Manchester, L=Salford, O=COMODO CA Limited, CN=COMODO SHA-256 Client Authentication and Secure Email CA
        Validity
            Not Before: Jun 18 00:00:00 2016 GMT
            Not After : Jun 18 23:59:59 2017 GMT
        Subject: C=NL, CN=Remy van Elst/emailAddress=antispam@relst.nl
        Subject Public Key Info:
            Public Key Algorithm: rsaEncryption
                Public-Key: (2048 bit)
If you have completed the validation of the certificate at the certificate provider or you have the self signed certificate ready, we can proceed to load the certificate into the HSM. We need to load the certificate in the HSM so that Thunderbird is able to use it. Otherwise there would just be a public key.
The HSM only accepts DER format, so first convert the PEM file you generated
or received from your CA to DER:
openssl x509 -in antispam.relst.nl.pem -out antispam.relst.nl.der -outform der
The below command writes the certificate into the HSM:
pkcs11-tool --module opensc-pkcs11.so --login --pin 648219 --write-object antispam.relst.nl.der --type cert --id 40
Output:
Using slot 1 with a present token (0x1)
Created certificate:
Certificate Object, type = X.509 cert
  label:      Certificate
  ID:         40
Make sure the ID is correct.
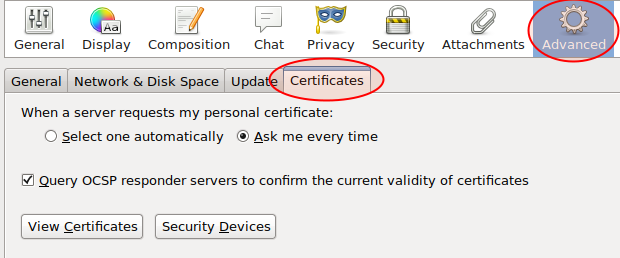
Start up Thunderbird and go to the Settings/Preferences menu. Open the
Advanced tab and select the Security Tab. Click the Security Devices
button:
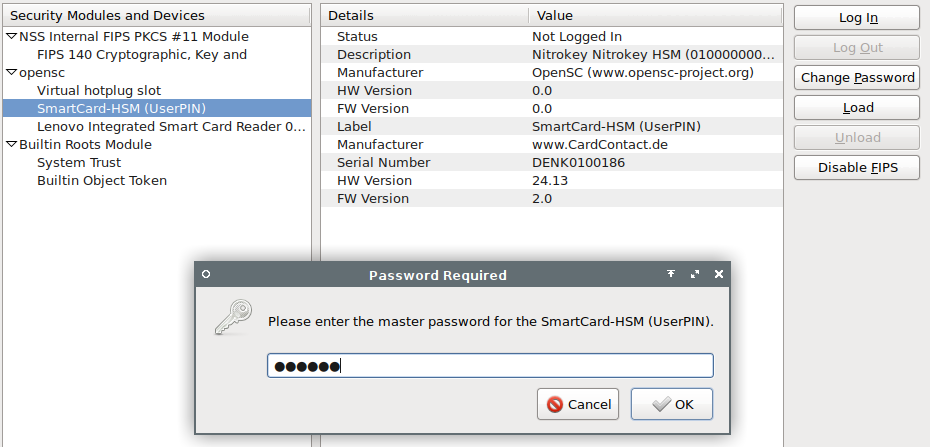
Select the SmartCard-HSM (UserPIN) under opensc and click the Login
button. Enter the User PIN (648219). The status should change from Not logged
in to Logged in Click the OK button.
To view the certificate, select the View Certificates button. Your certificate
should be loaded under the Your Certificates tab, with SmartCard-HSM as it's
Security Device.

Open up the Account Settings window and under the correct email account,
select Security. Under Digital Signing and Encryption select the correct
certificate in the HSM:
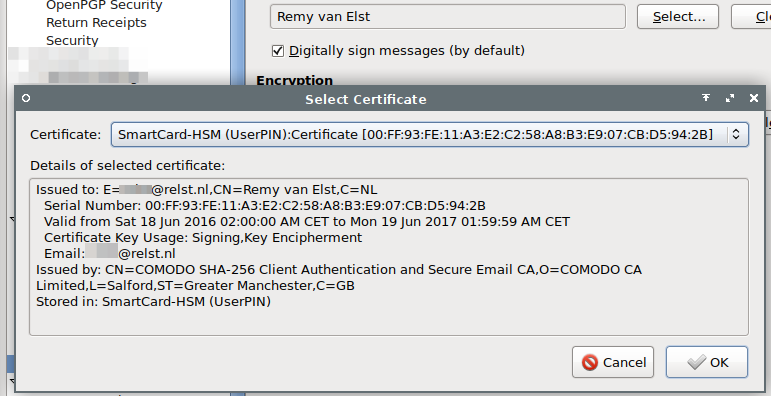
Save all settings and send yourself a test email. You should be able to sign (or encrypt if you have someone elses S/MIME key) the message and while sending your HSM LED turns on.
Deleting objects from the HSM
If you are done with testing or want to free up space on the HSM you can remove objects from it. You can delete certificates and the private keys, either by ID or label. For example, when your S/MIME certificate is expired and you need to load up a new one, delete the old one first.
The below command removes a certificate from ID 10:
pkcs11-tool --module opensc-pkcs11.so --login --pin 648219 --delete-object --type cert --id 10
The below command removes a private key from ID 10:
pkcs11-tool --module opensc-pkcs11.so --login --pin 648219 --delete-object --type privkey --id 10
The below command removes the data from label 'HSMdata':
pkcs11-tool --module opensc-pkcs11.so --login --pin 648219 --delete-object --type data --label HSMdata
You can check before and after a delete command if the object is gone with the below command:
pkcs11-tool --list-objects
Do note that when you remove a privkey you also remove the certificate and any data.
Apache with mod_nss
![]()
I've written a seperate guide on using the HSM with Apache. Please read the full guide here.
There is a different module you can use next to the OpenSC module, named sc-
hsm-embedded. This module provides fast, read only access to the HSM, and is
better suited for production use, since on a production machine you don't need
to manage keys on the HSM, you do that on your offline management workstation.
The guide for mod_nss, Apache and the read-only-module sc-hsm-embedded is on
a seperate page as well.
Decrypting the private keys of the HSM
This is a guide which shows you how to extract private RSA key material from the Nitrokey HSM / SmartCard-HSM using the DKEK. This way you can get the private key out of the HSM in an unencrypted form. It does require access to the HSM device, all the DKEK share and their passwords. Do note that doing this defeats the entire purpose of a HSM, namely that you never have access to the keys. In the article I'll go over some explanation why this might be a feature you need and why it might be a case of security over convinience.
*** This is not a vulnerability, zero day or exploit. The HSM provides a way to do secure backups of private key material and we utilize that in this article. To decrypt the keys you need to have all the DKEK files used when the HSM was initialized, know all the DKEK passwords and have access to the HSM itself. **
You can prevent decryption by not setting up a DKEK, thus using the random internal DKEK of the HSM.
This guide is on a seperate page as well.
Storing arbitraty data in Elementary Files (EF)
This is a guide which shows you how to write small elementary files to a nitrokey HSM. This can be usefull if you want to securely store data protected by a user pin. You can enter the wrong pin only three times, so offline brute forcing is out of the picture.
You could for example, store a file in the HSM and send it via the old-fashioned mail to someone, without sending the required pin. You send that via a different channel, preferably privately in person. The other person then can read the file of the HSM using the PIN. Since you only have 3 tries for the correct PIN, you know that an offline brute force attack is not likely to happen. If you encrypted a file an placed it on a regular USB drive, the post could be intercepted and stored for offline cracking by a government agency, without you knowing it. Because the pin entries are recorded, you know immidiately when the device has been tampered with.
This guide is on a seperate page like the others.
Tags: articles , cryptoki , hsm , nitrokey , nitrokey-hsm , openssl , pkcs11 , safenet , smartcard , smartcard-hsm